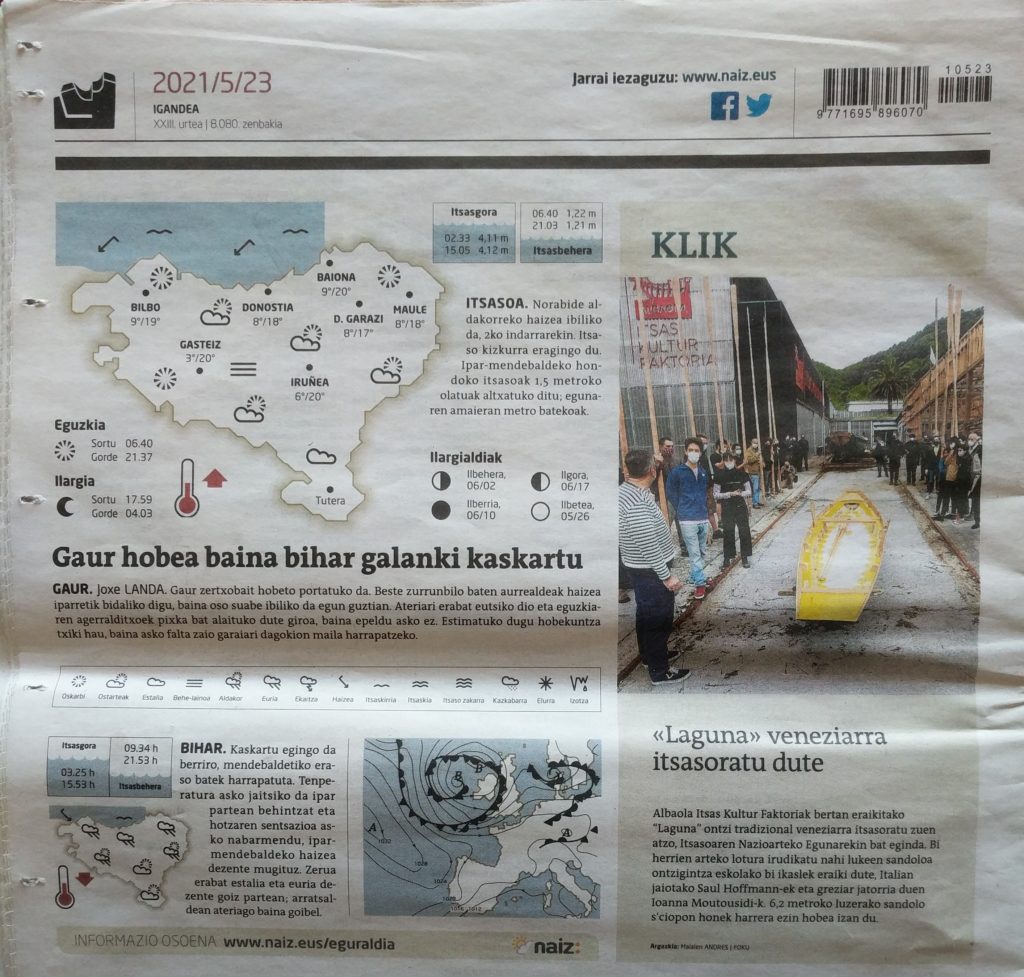
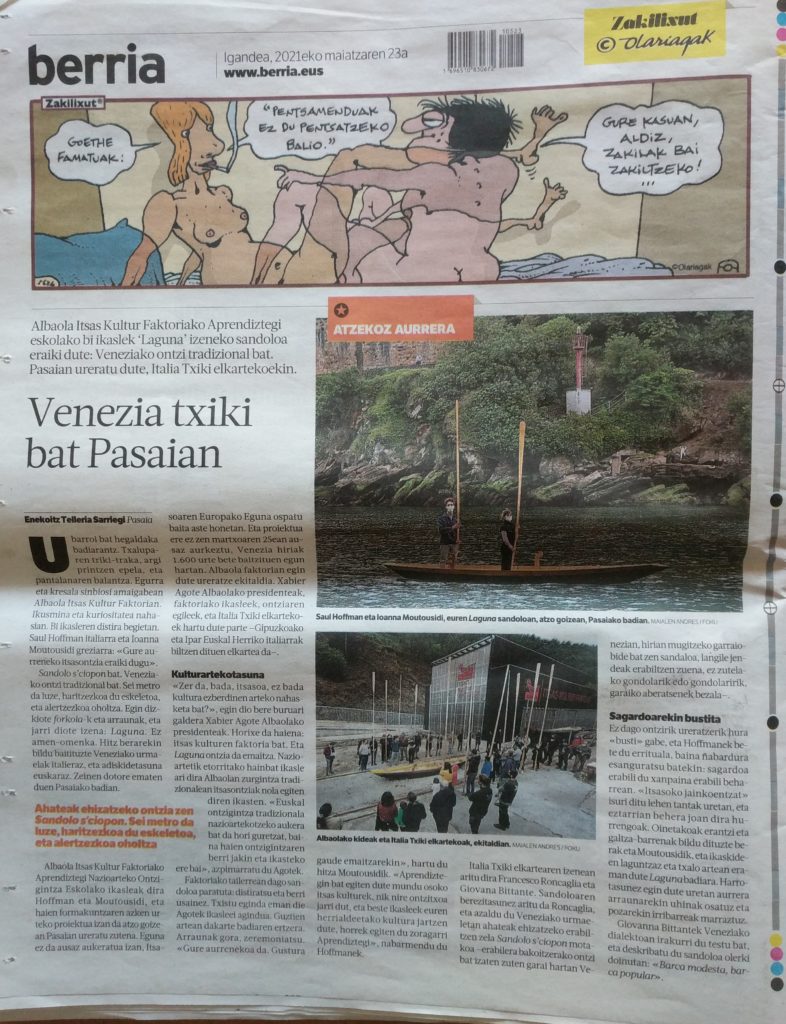
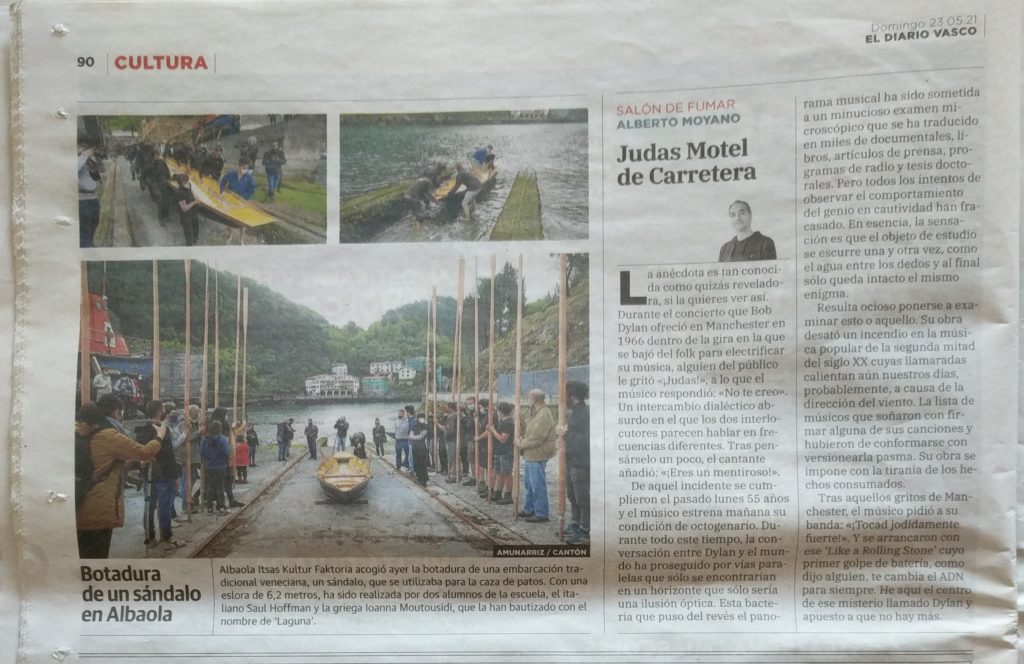
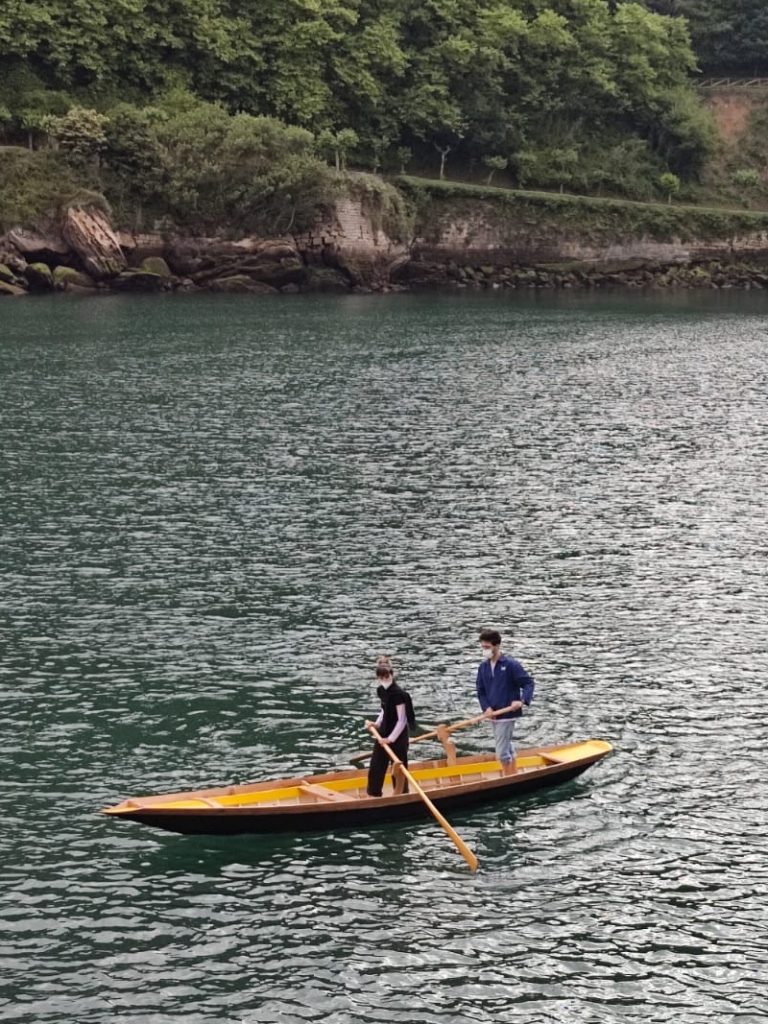
We launched the boat today! I am so happy, and tired, and proud, and relieved.
I know you are eager to see the pics of Laguna in the water, but let me first talk briefly about the last week of work.
Of course we started working on Monday again, we had no time to loose. First step: bilge paint.
We used a bituminous paint especially designed for “humid environments”, on top of the standard two coats of primer.
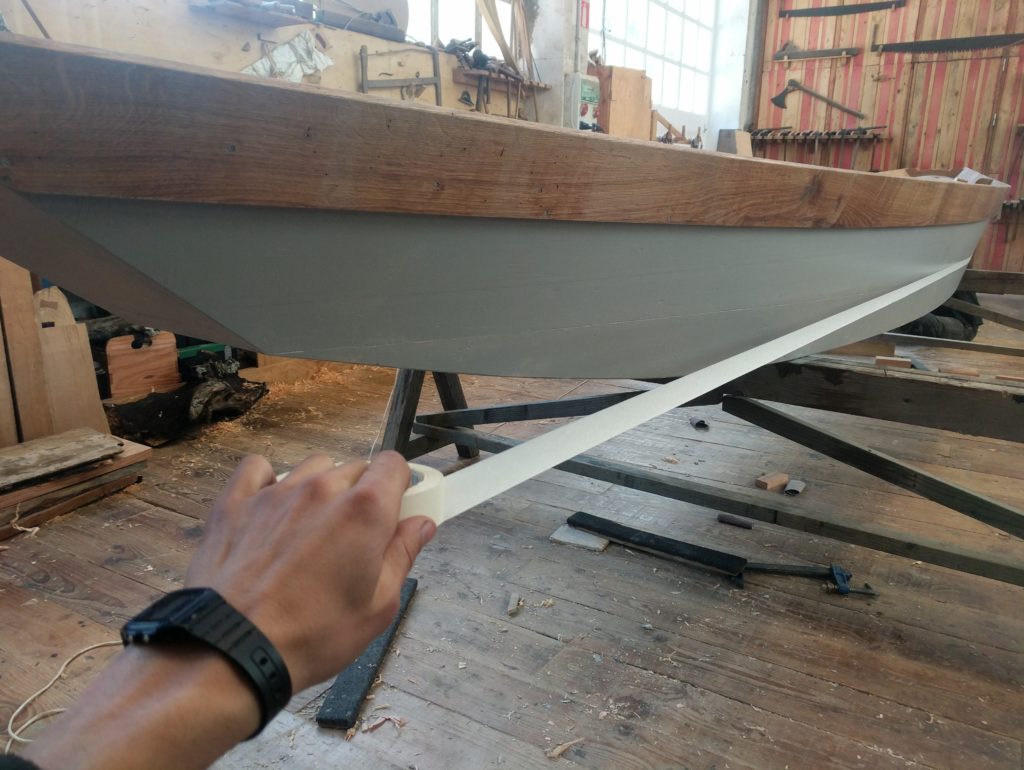
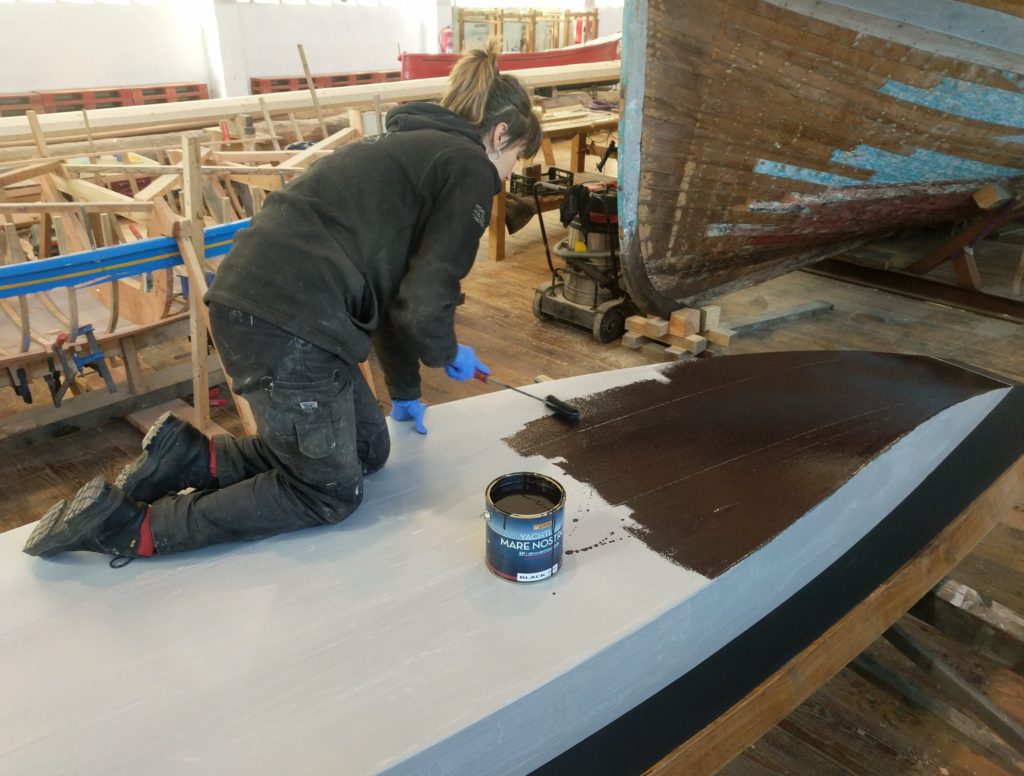
Then was the time to draw the waterline and paint the sides. At the end, we will find out that the line should have been lower at the aft and higher at the bow (maybe -4cm and +4cm, respectively).
Masking tape is your friend here, try to pull it all in one shot to avoid unfairiness.
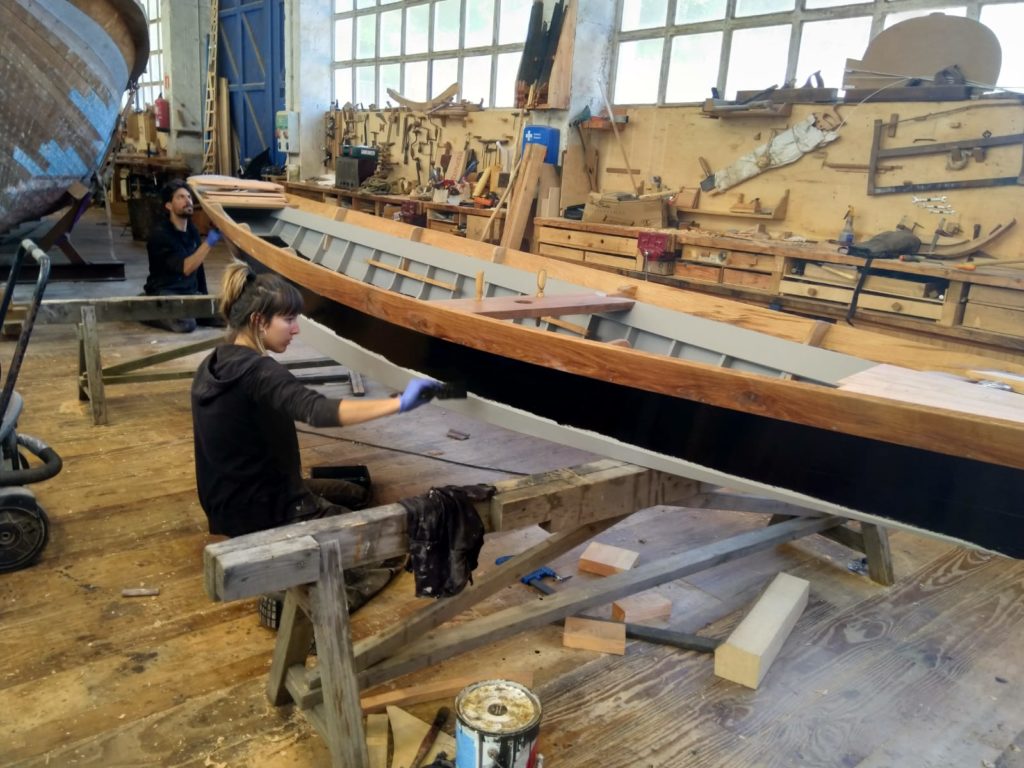
I passed with a roller, Ioanna followed with a brush to finish the sides.
There will be two coats of matte black paint. The idea is to recall the traditional tarring of the hull.
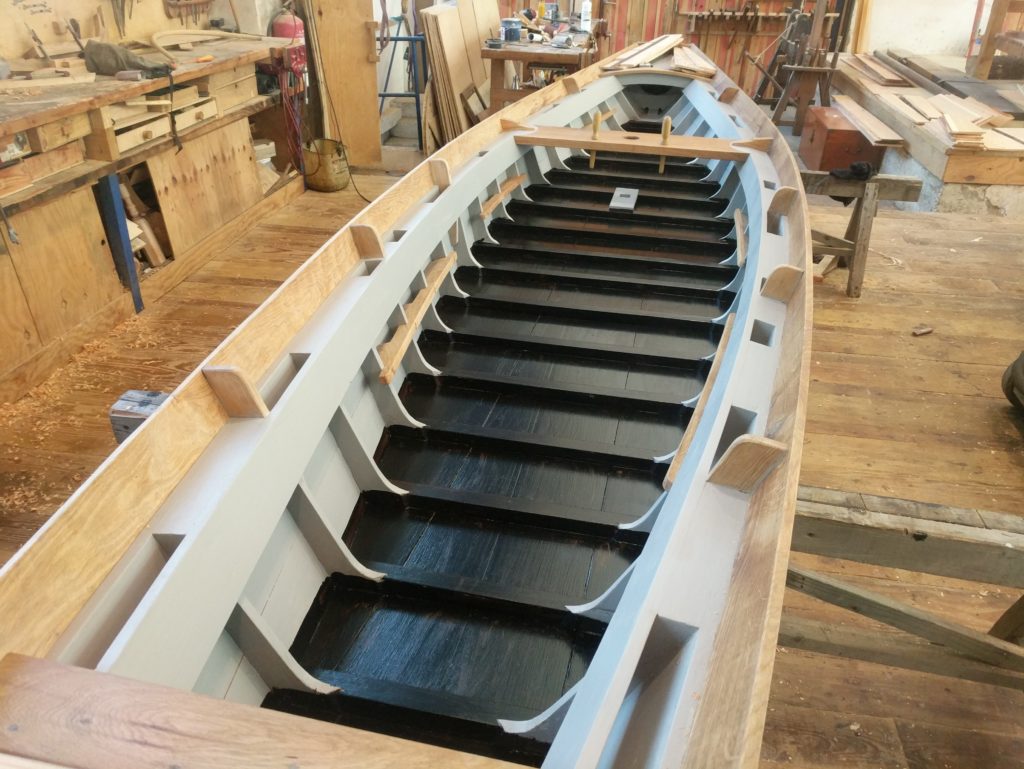
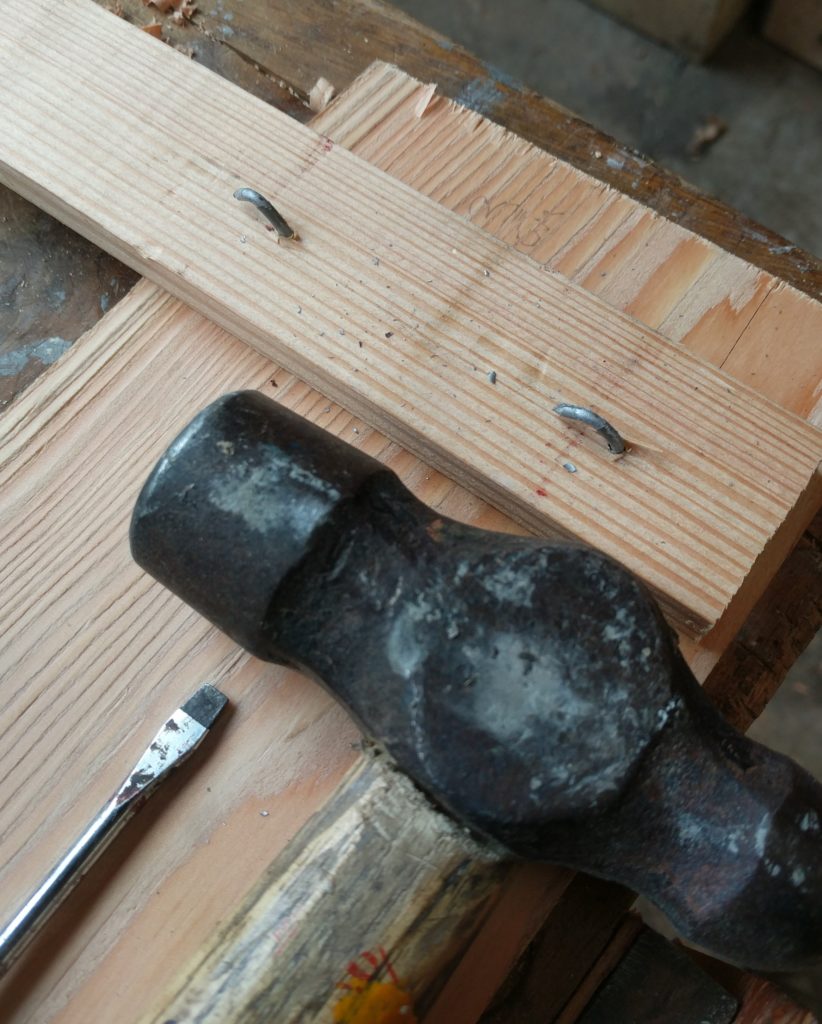
The bilge paint dried pretty fast, so we could soon start working on the floor boards. Again, we chose to build them the traditional way, instead of using marine plywood. The parts are held together by clunched galvanized nails.
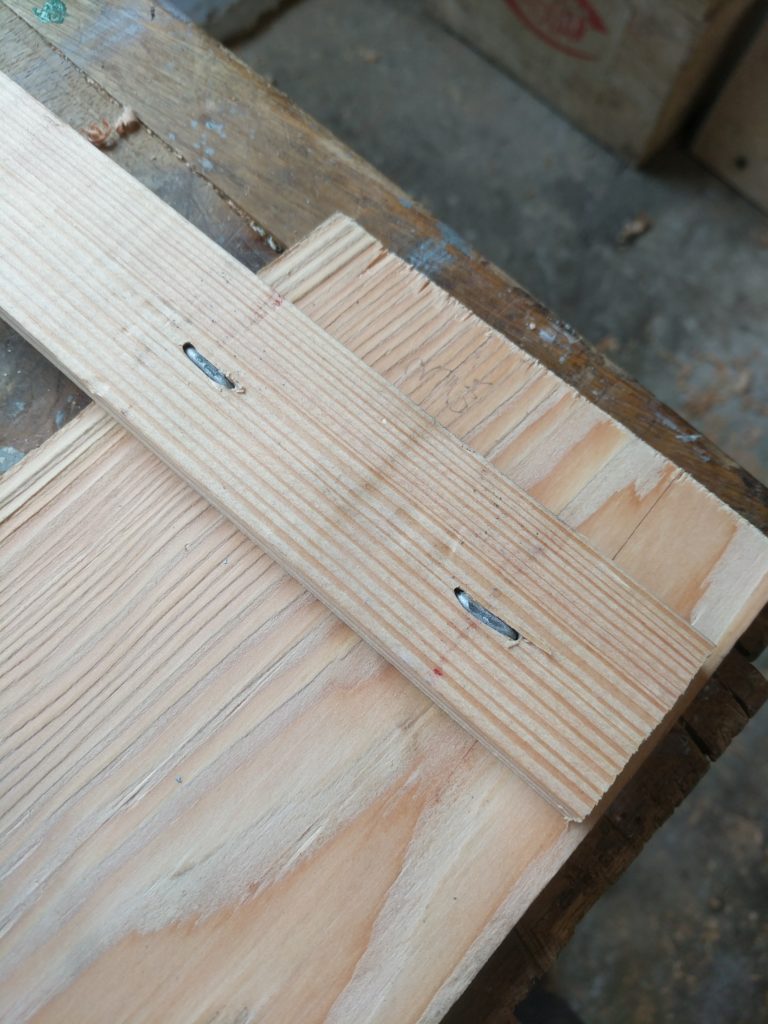
Hammer the tip of the nail around a screwdriver or some other kind of metal rod
Then remove the screwdriver and sink the nails into the wood.
Remember to follow the grain, in order to be able to sink them properly.
After that, cover with putty in order to avoid corrosion (the hammering removes much of the galvanizing)
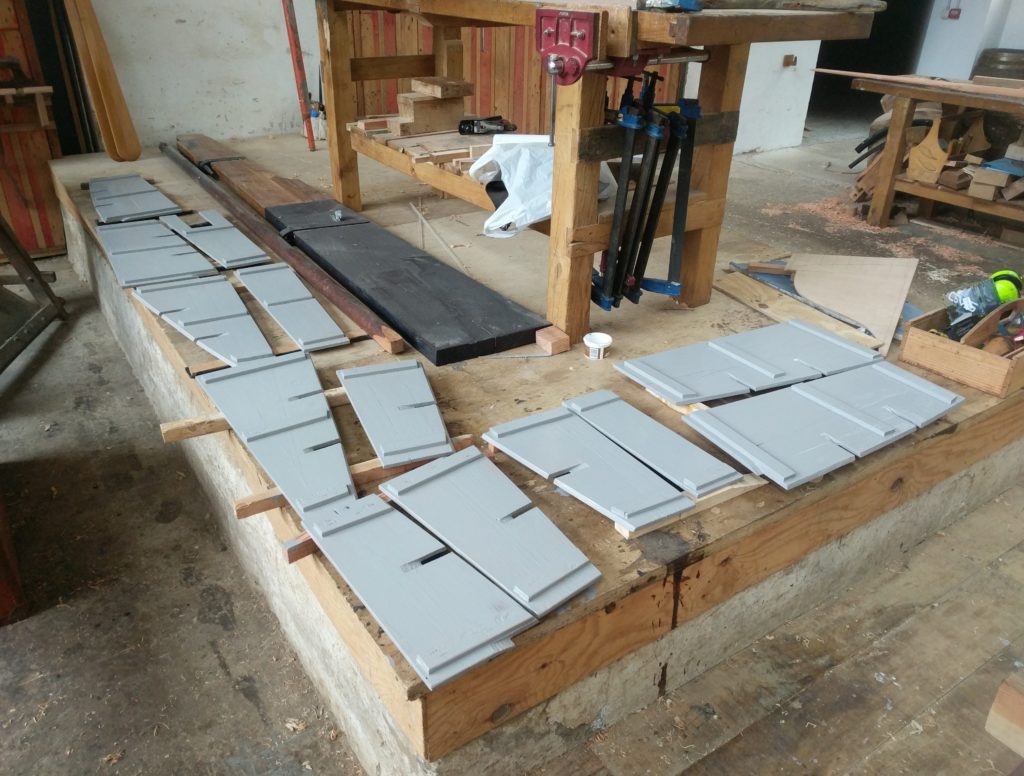
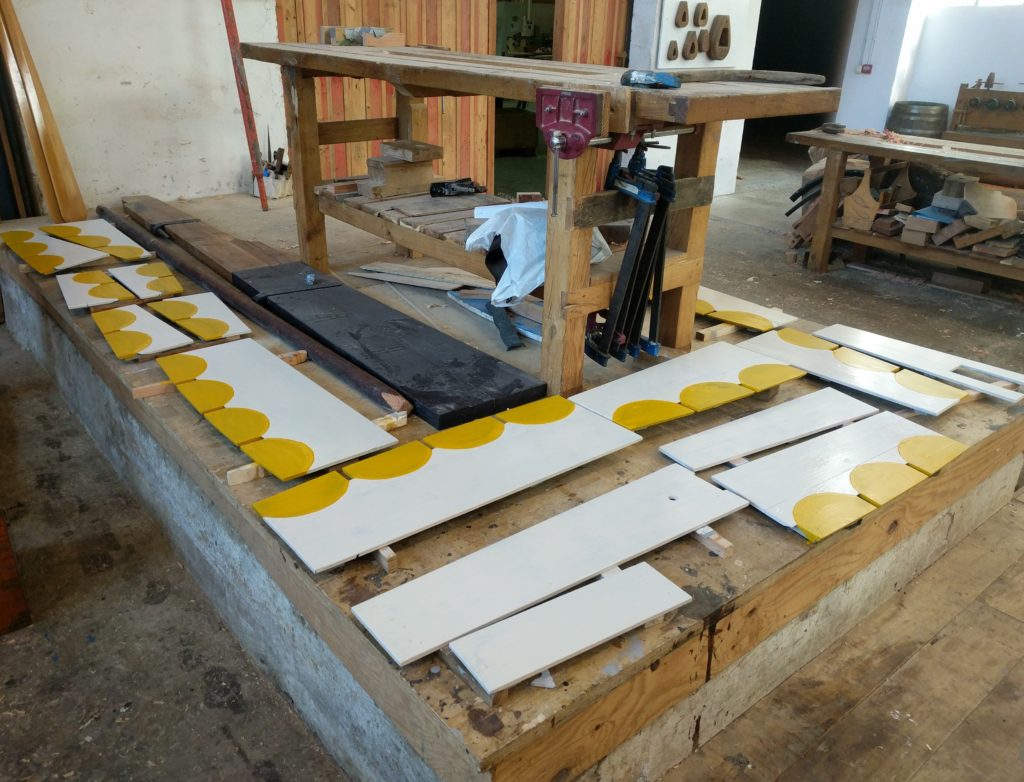
When ready, we painted them two coats of primer, plus two coats of the same paint we used for the interior of the boat. In aftertought, maybe they’re too whitish, but there is not much sun here anyway 😉
They resulted to be quite slippery, so we are thinking of adding one more coat of white with some sand (I heard they use sugar sometimes for this, I’ll look into it next week).
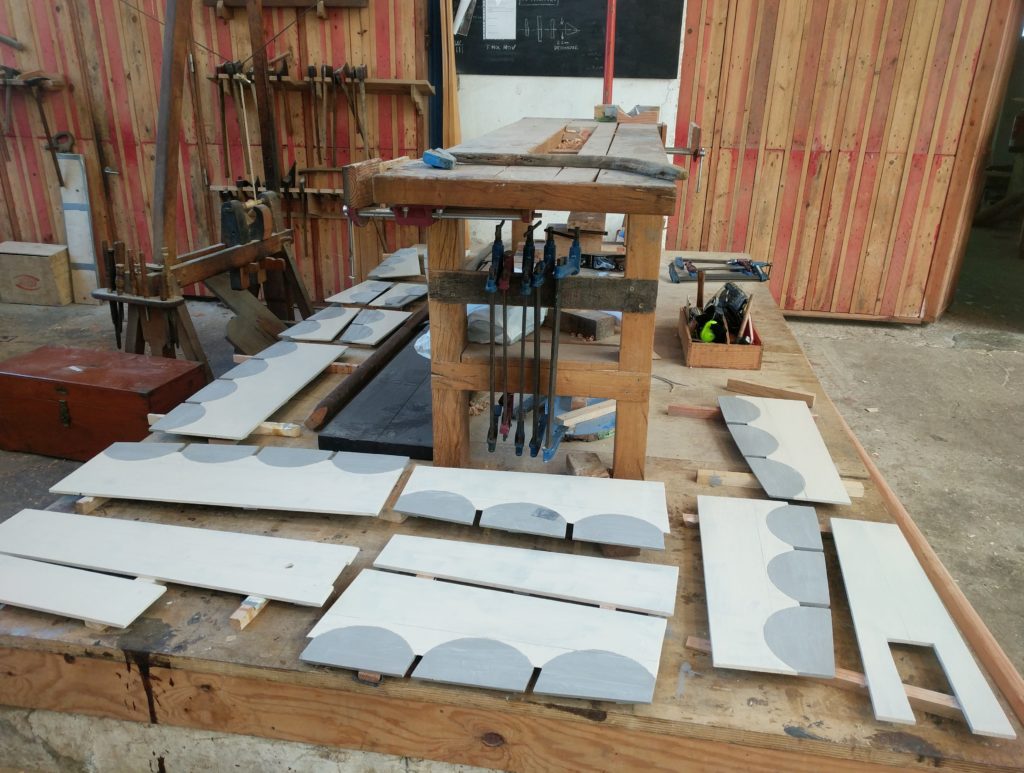
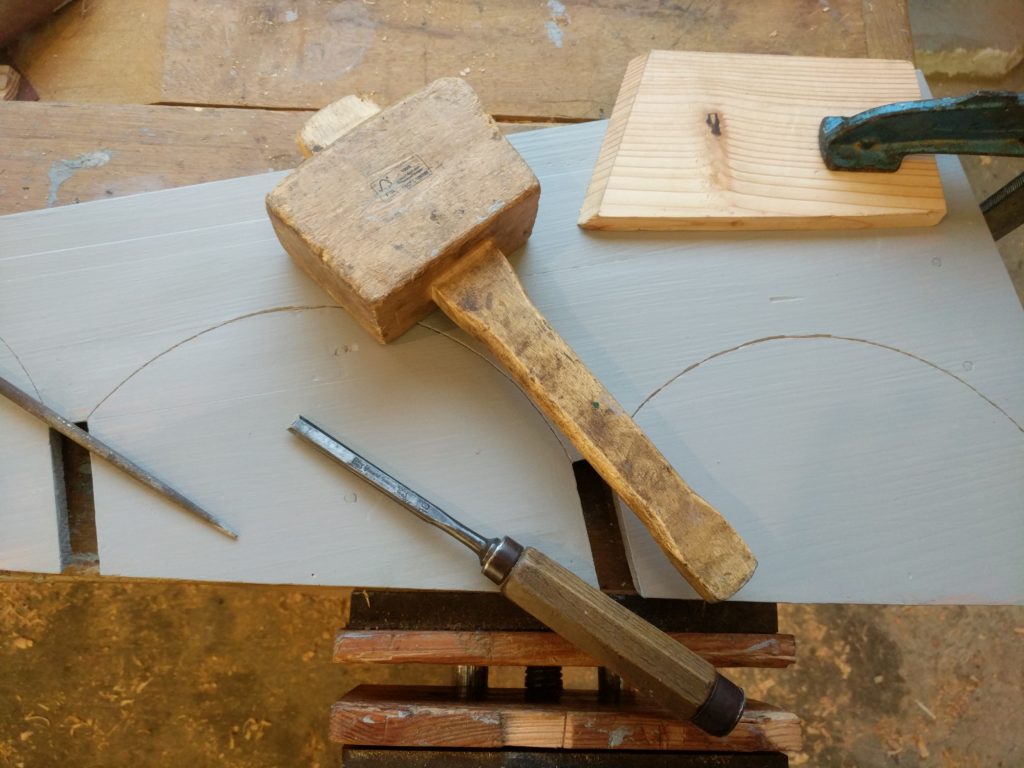
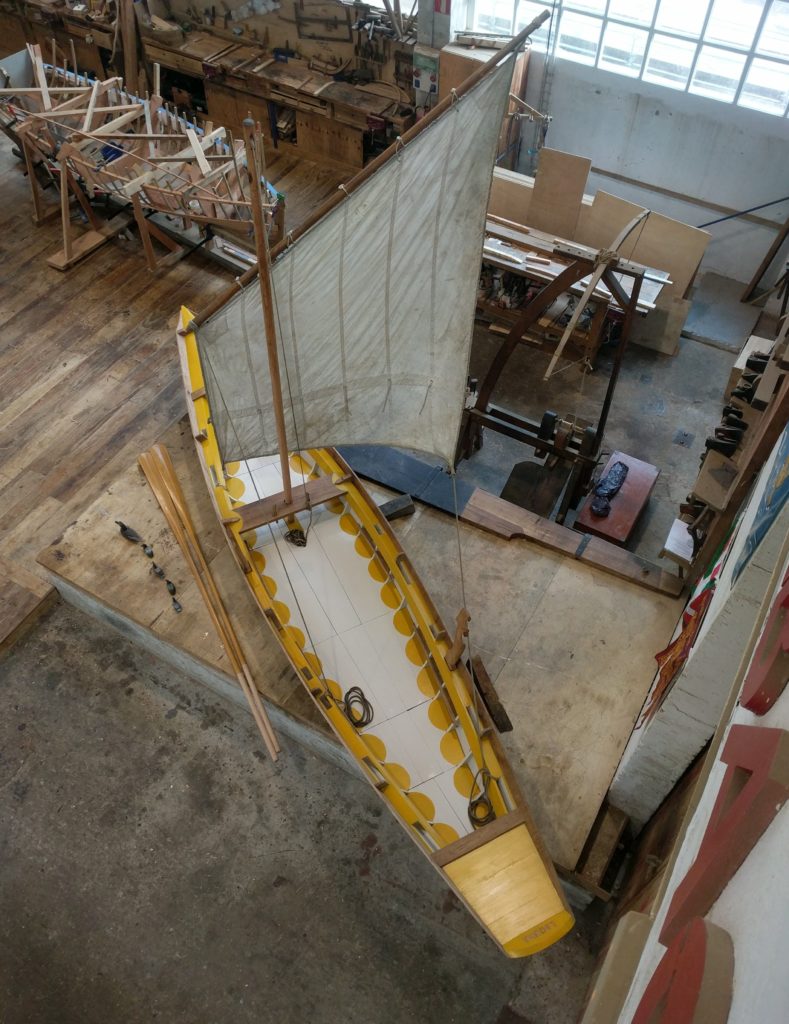
The semi-circles are traditional from Venice, and we decided to carve them on the boards in order not to erase them when painting them in the future.We also painted the inside of the boat with this whitish beige, leaving the sotocorboli (the supports for the forcole) unpainted (they’ll be oiled, like all other parts with wood left visible).
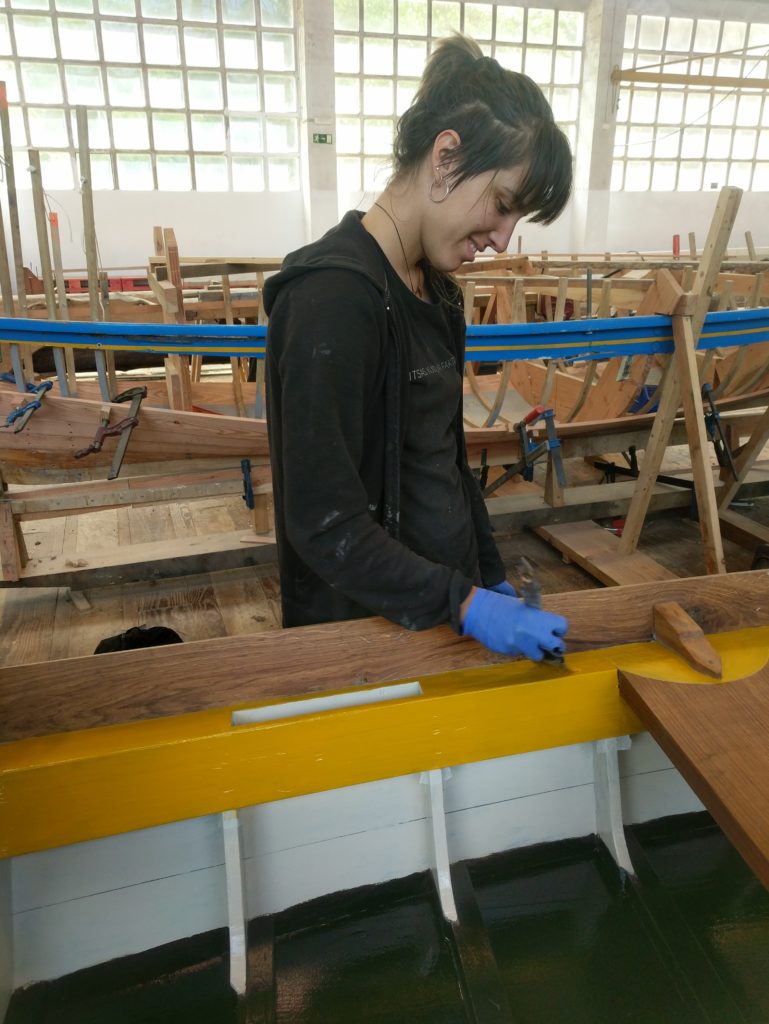
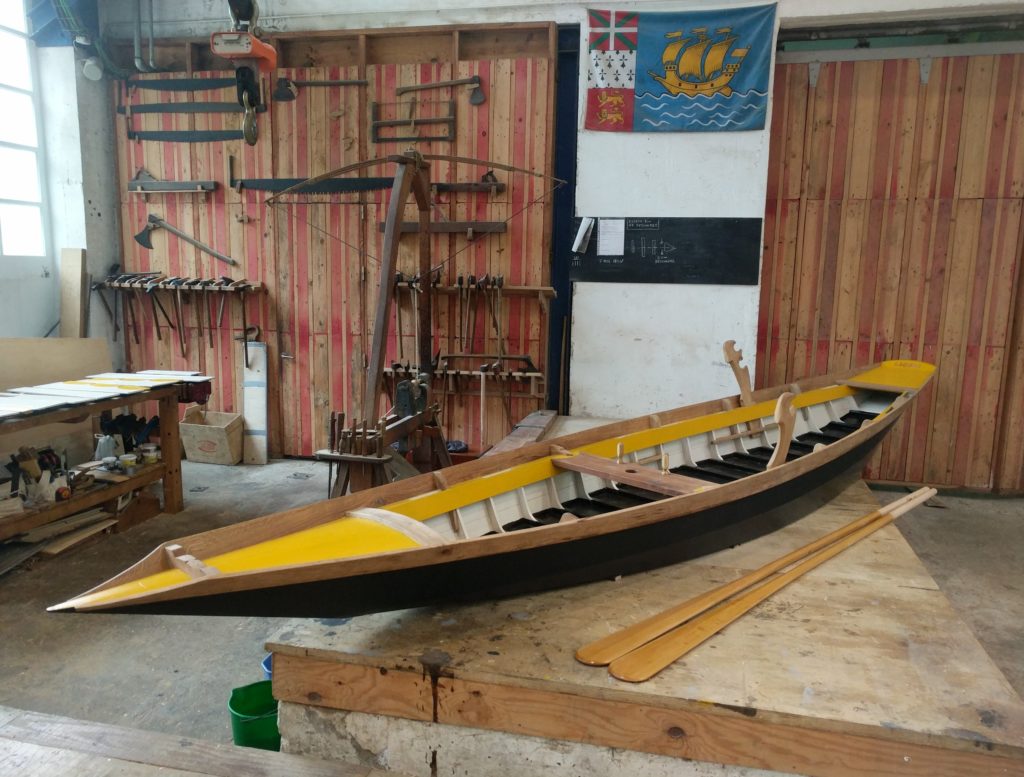
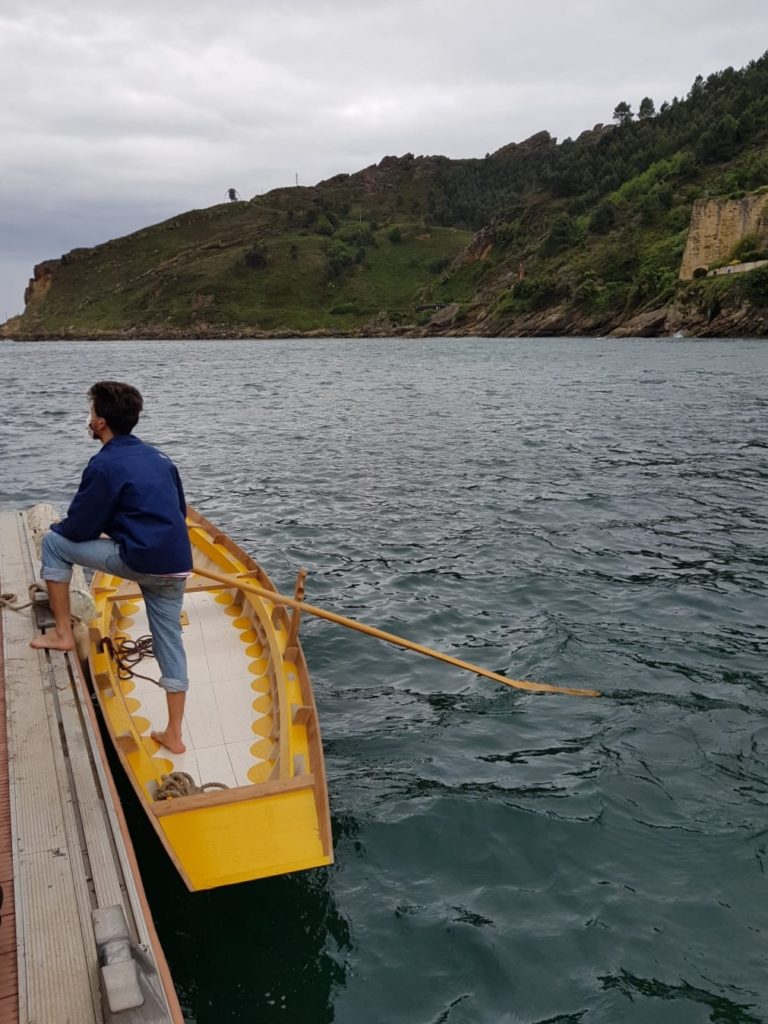
For decks and gunwale after much thinking (green? blue? yellow?), we finally chose yellow and I’m very happy we did. It looks great.
Fun fact: it is the paint we use for the crane in the workshop!
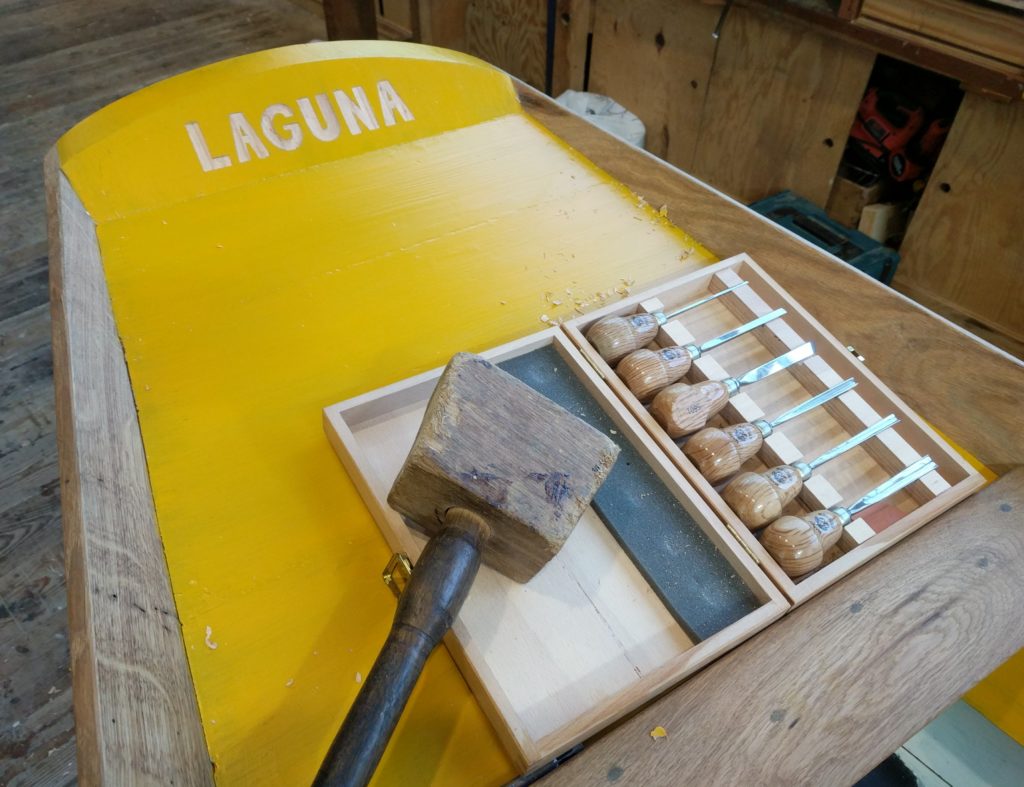
Since the boat has a name, we decided to carve it on the transom. This is not traditional, but we liked the idea of having the name visible. The sides are really too low on the water to write something on them.
Of course it was Ioanna who took care of it.
Some black antifouling finished the job. Usually in Venice they put two coats on the bottom planks and three on the sides, because since they are more exposed to sunlight normally have more growth of marine life.
Luckily for us, Jotun is one of the mayor sponsors of Albaola.
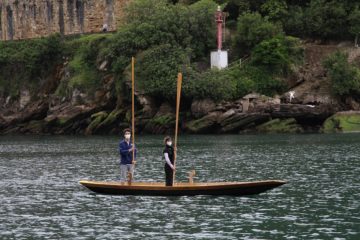
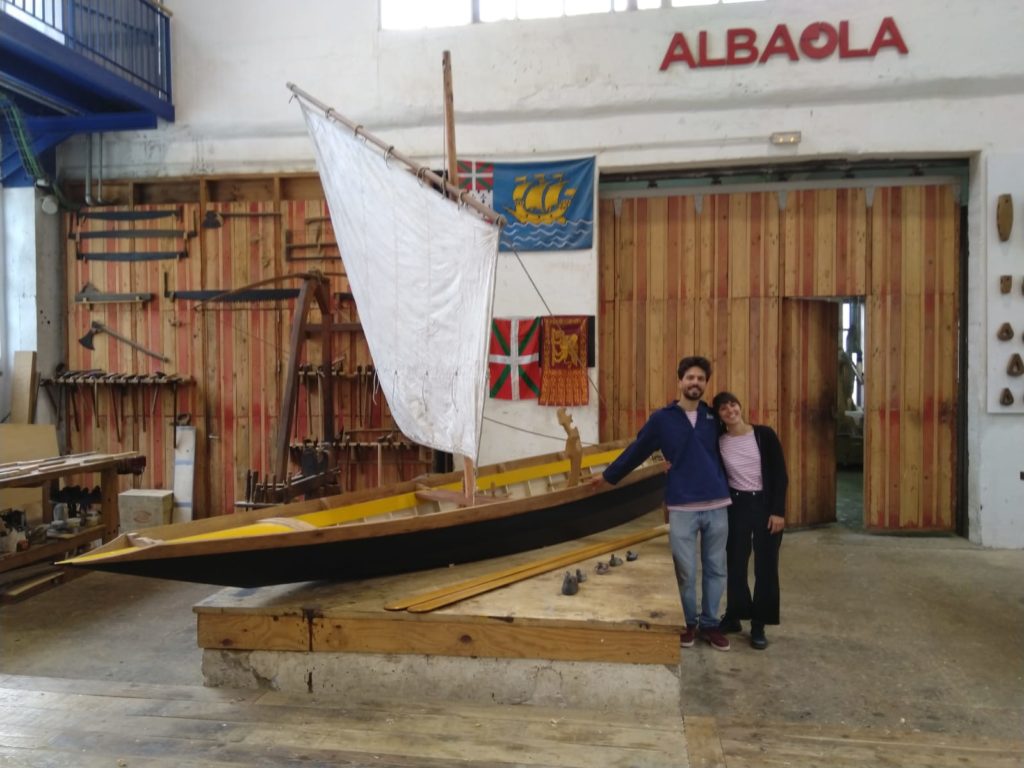
And here is the boat in all it’s beauty, actually still waiting for the second coat on the floor boars to dry (you can see them on the bench on the left).
We even had some extra time to find and old mast that was lying around and borrow the smallest sail we could find.
Please note the family of ducks on the left. How cute are they?
Here we are, the Saturday of the launching, tired but proud of our work.
As soon as I get more pictures of the day I will make sure I post them here, for now here are a few for you to enjoy.
This week we closed the hull. All four missing planks have been hanged and the compulsory whiskey bottle has been drunk. But let’s start from the beginning.
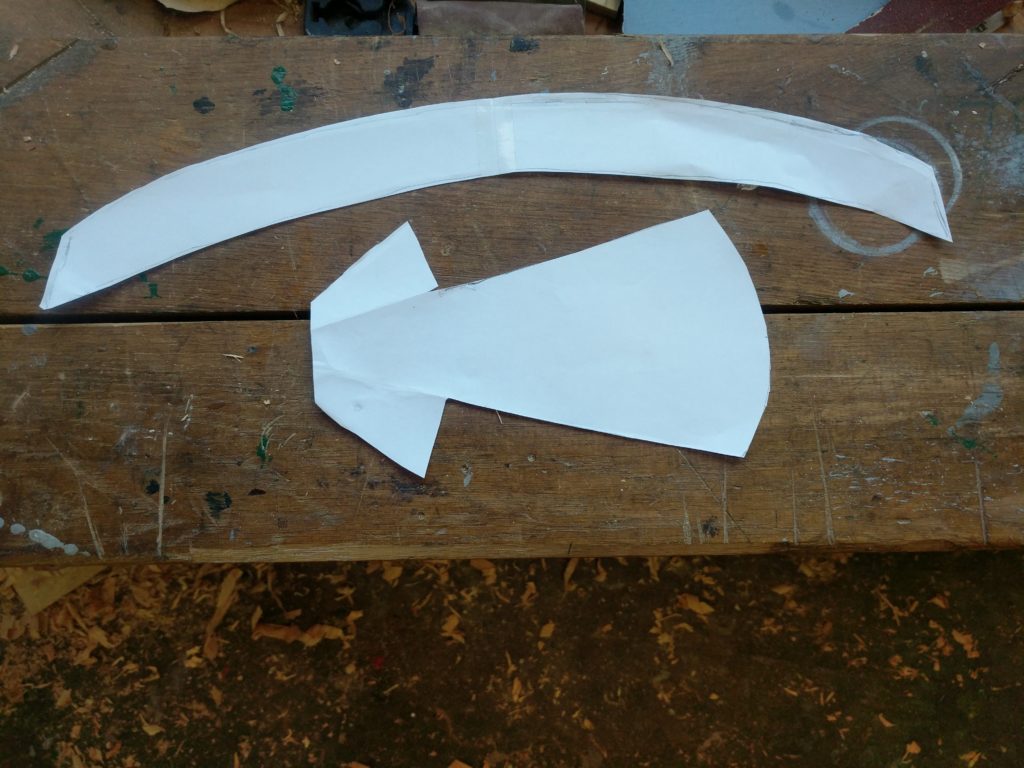
We don’t usually work on Monday, so I had the time to go to the junkyard and look for a sheet of some non-ferrous metal for the protections going at the tip of the bow and on the top of the transom.
I brought with me a couple patterns in order to know what kind of dimensions I would need.
Unfortunately, I found nothing of the right metal and/or thickness… If it wasn’t something that would have actually protected the boat it didn’t make sense to damage the boat with more fastening, especially in these already delicate parts (transom and breasthook/stem).
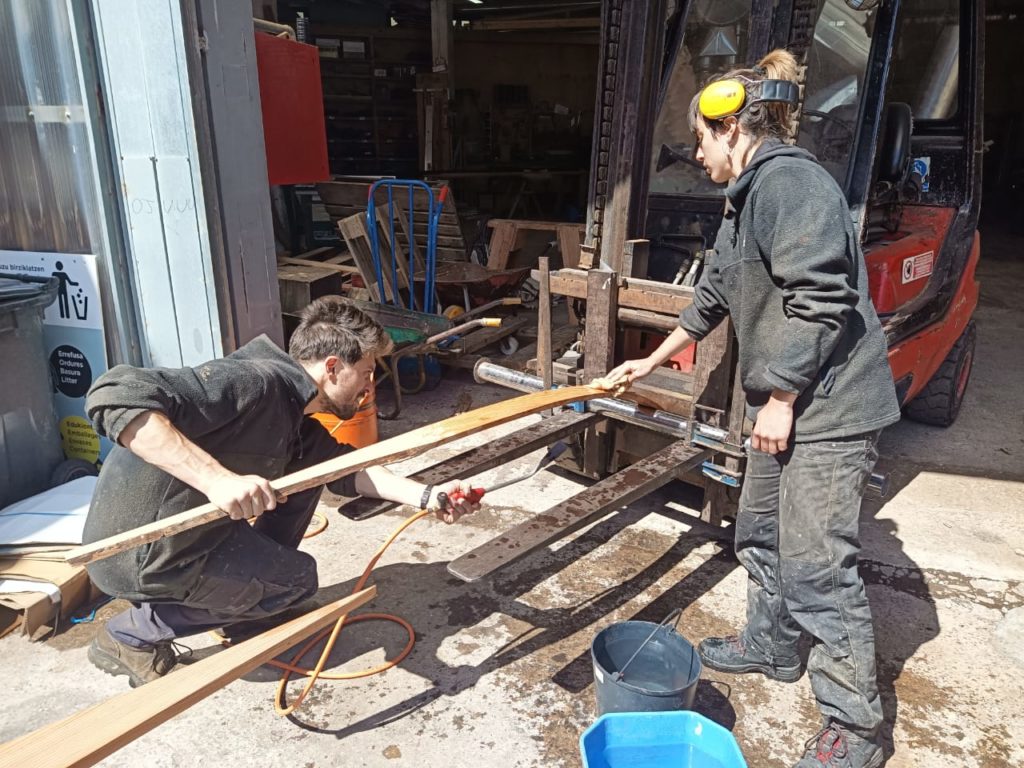
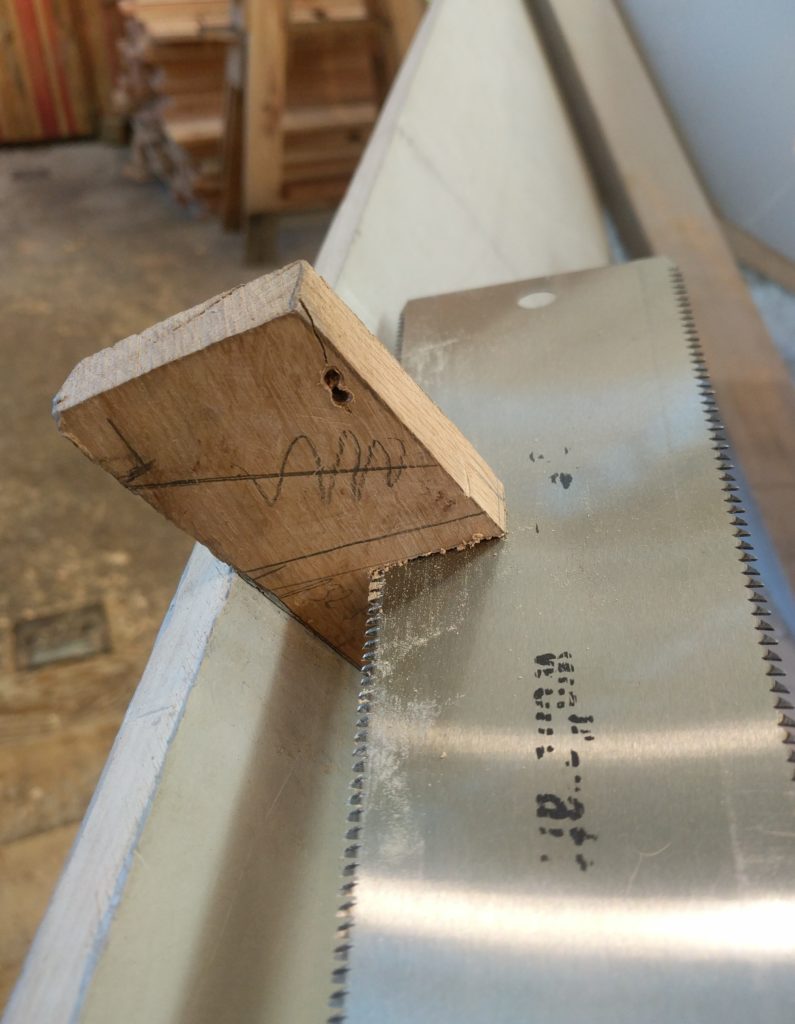
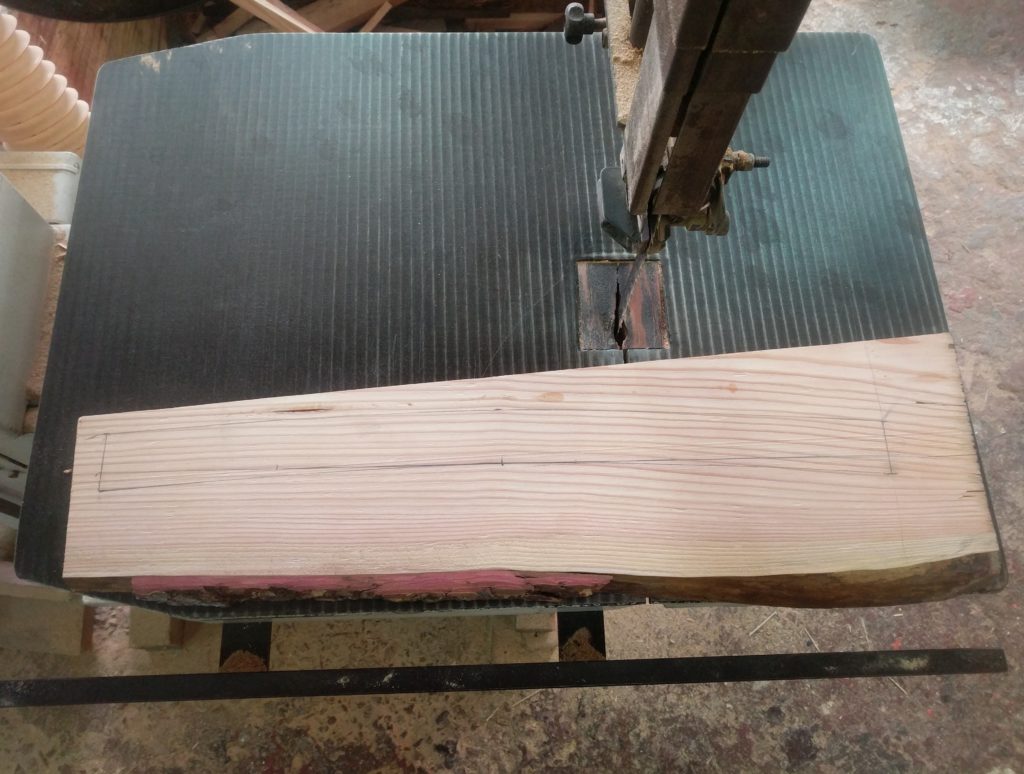
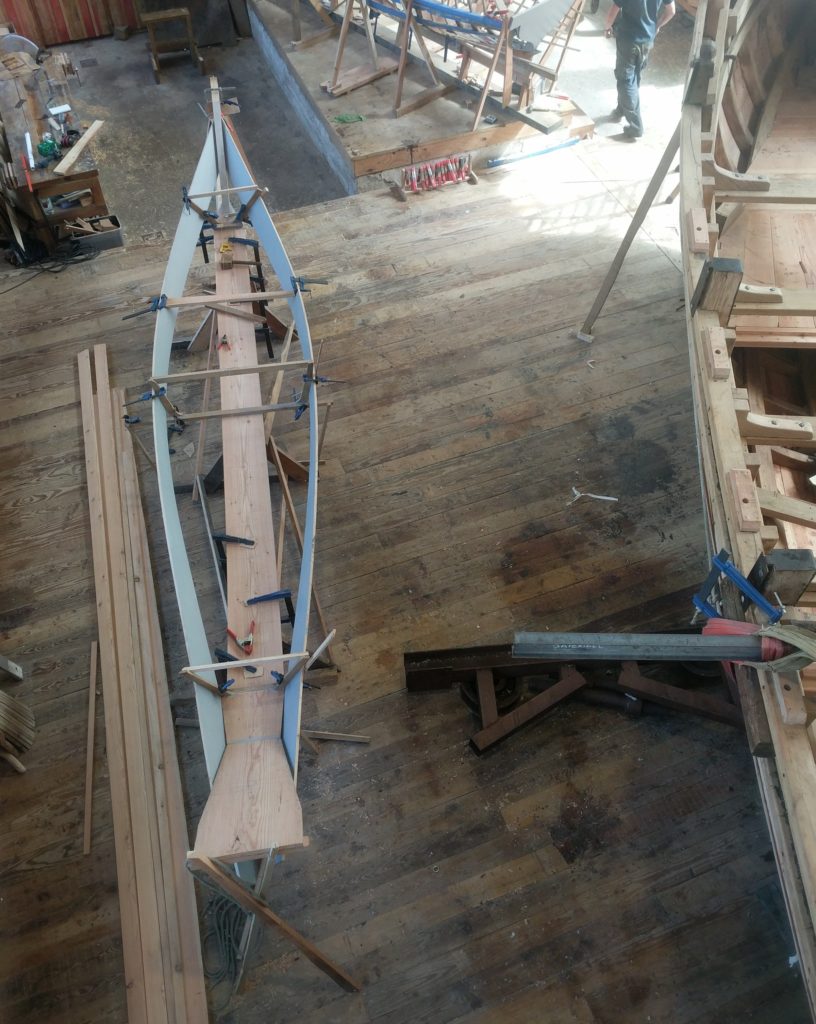
The following days we worked on the remaining planks. First the two sides of the bottom go in. These have a very fine tip at the aft end, where there is the biggest curvature, therefore I decided to pre-bend them with heat.
Here in Albaola we commonly do it using a steambox (if you recall, it’s how I bent the planks for the fore deck), but I wanted to try the Venetian way. This video clearly shows how it’s done:
https://www.youtube.com/watch?v=ElY-4DkUBzI
We used a much modern set up, but it was the same in principle.
Bottom left you can see the actual bottom plank. We are testing the set up with an offcut before going for the good one.
This method is much faster, but leaves some charred scars to the wood. Our boat is going to be painted so it didn’t really matter.
The edges of the plank are trimmed after the plank has been nailed on.
From the following picture you might notice that the central plank is asymmetrically placed. This is simply because we couldn’t find two planks with the same width for the sides of the bottom. The original boat our plans are based on has five bottom planks in total, but we tried to have less seams…
On the left, the two side planks are waiting for their turn.
In the Anglo-Saxon boatbuilding world, the last plank is cheered with a bottle of whiskey (from here the term “whiskey plank”). Our teacher is from the U.S.A., so we embraced this tradition.
We left a few clamps overnight in order for the wood to release some of the stresses. The top edge was trimmed flush on the day after.
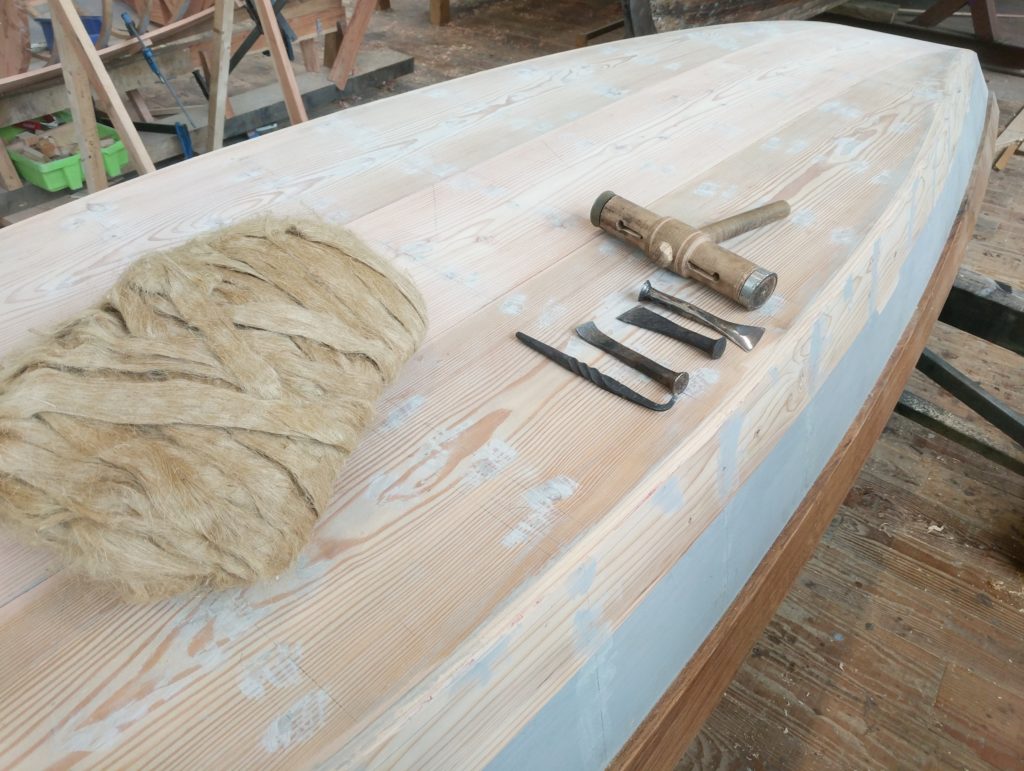
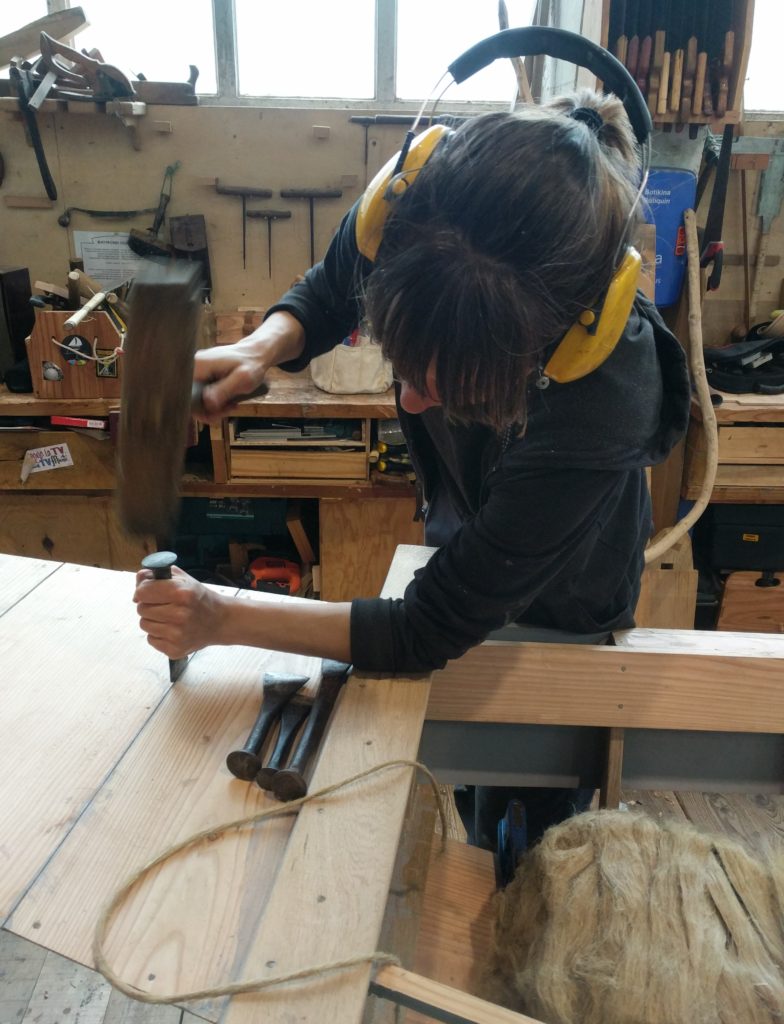
Time for a round of caulking! We chose oakum instead of cotton string, because hemp is what was used traditionally.
Those irons have been made by Ioanna herself her in Albaola’s forge, cool eh?
These boats don’t have any caulking bevel on the edge of the planks, therefore you have to open up the seams with the iron. Of course, if you hit too hard you might break the plank towards the inside of the boat.
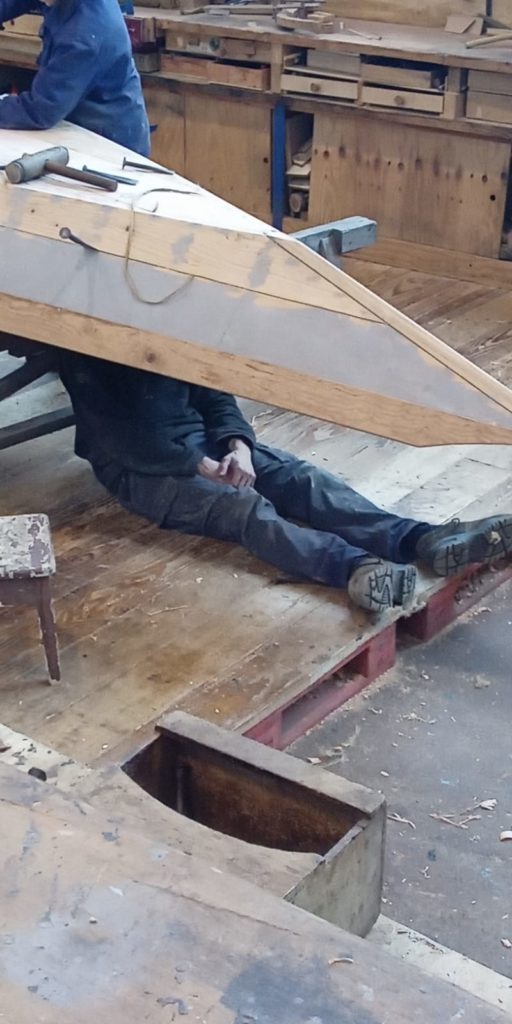
How do I know? Well, try to guess.
UPDATE: My friend Dani documented the moment of despair that ensued.
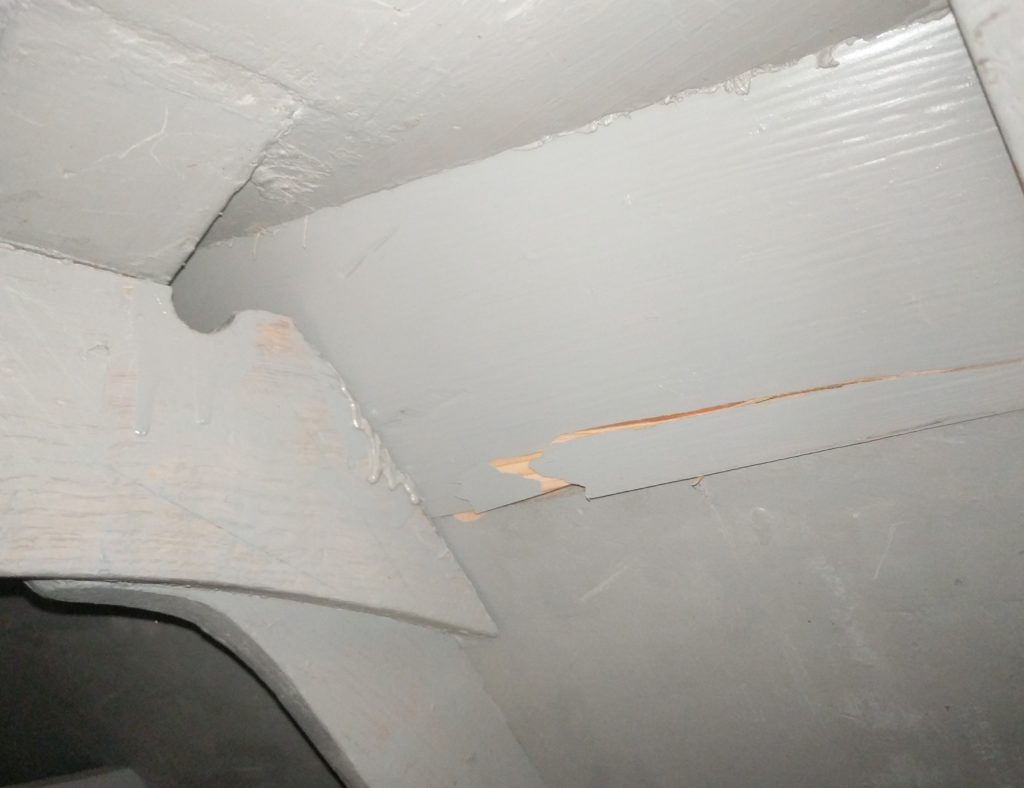
Part of the damage
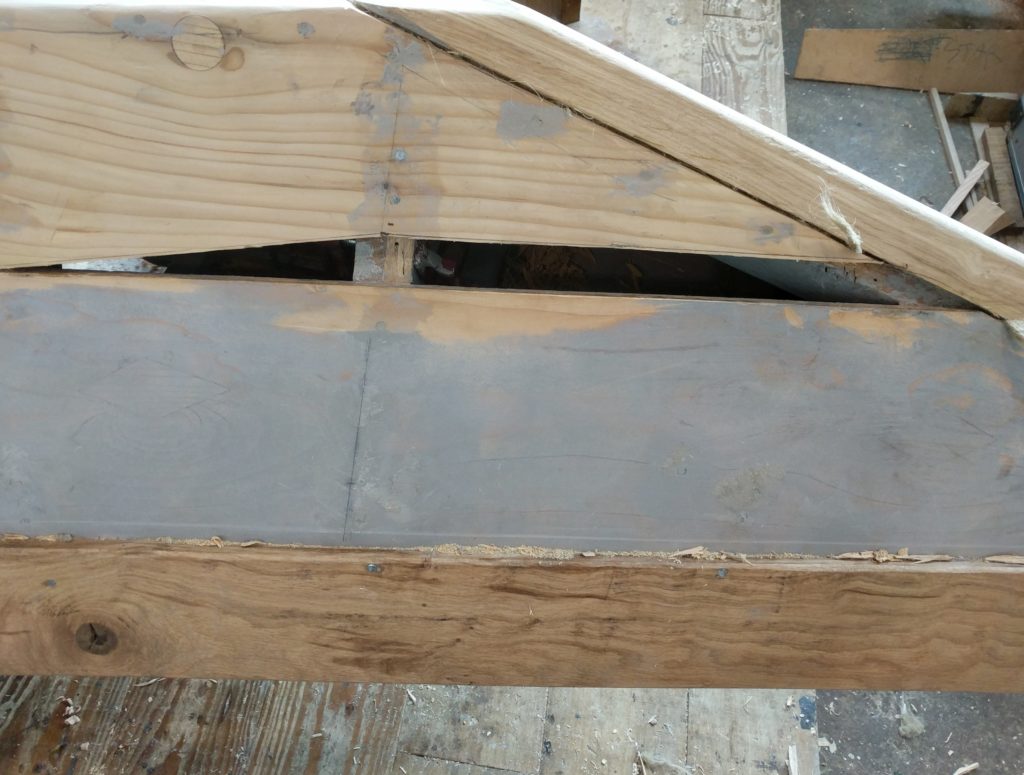
I decided to cut out the broken part…
…and to glue a new piece in.
It was a quick repair, but it could have been avoided in the first place, I know.
After having given a coat of primer to the bottom, and having paid the seams with linseed oil puddy and primer, we flipped the work to give the finishing touches to the interior.
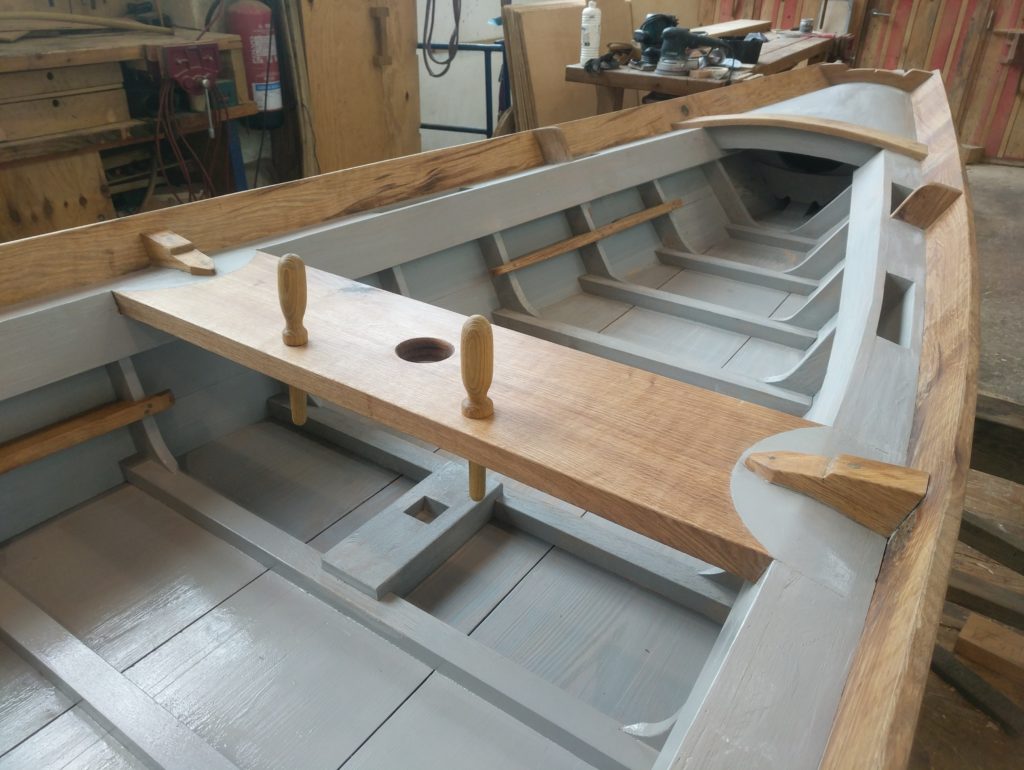
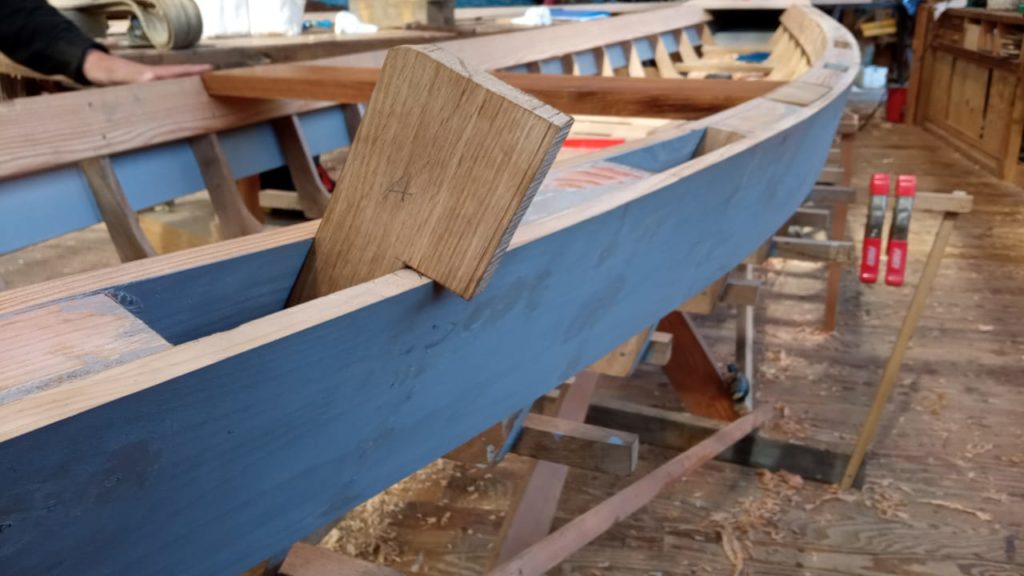
Last week I forgot to write that I had the shape of the stanchions changed slightly, to better armonize with the angles of the deck. This is particularly noticeable at the aft.
The spikes are for locking the halyard and other ropes when using the sail. They where made on the lathe and are of course removable.
Also the knees at the thwart have reached to their final shape, after much thinking, thanks to a sketch that Gilberto sent me. All the nail heads(although they are galvanized iron) have been covered by a mix of beeswax and resin, in order to try to further delay corrosion.
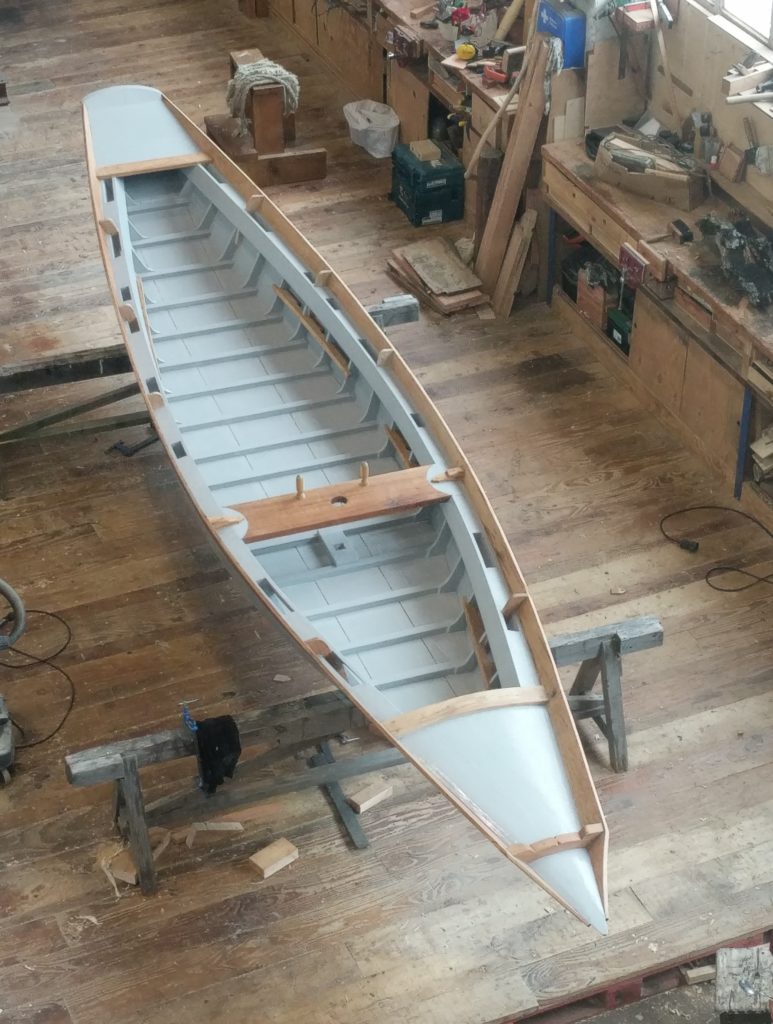
We then sanded everything, in and outside, and gave the boat a second coat of primer.
I must admit I am quite proud of how she came out.
Next week is the last one: launching date will be Saturday 22nd. We have less than a week left.
Before then, we’ll have to build the floor, for which we already milled up some larch, and then sand, paint, sand, and paint again. We have some colors in mind, but no spoilers until next week, bye!
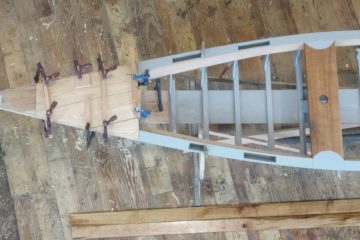
Last week I left you with a sight of the forward deck, more on it on this post.
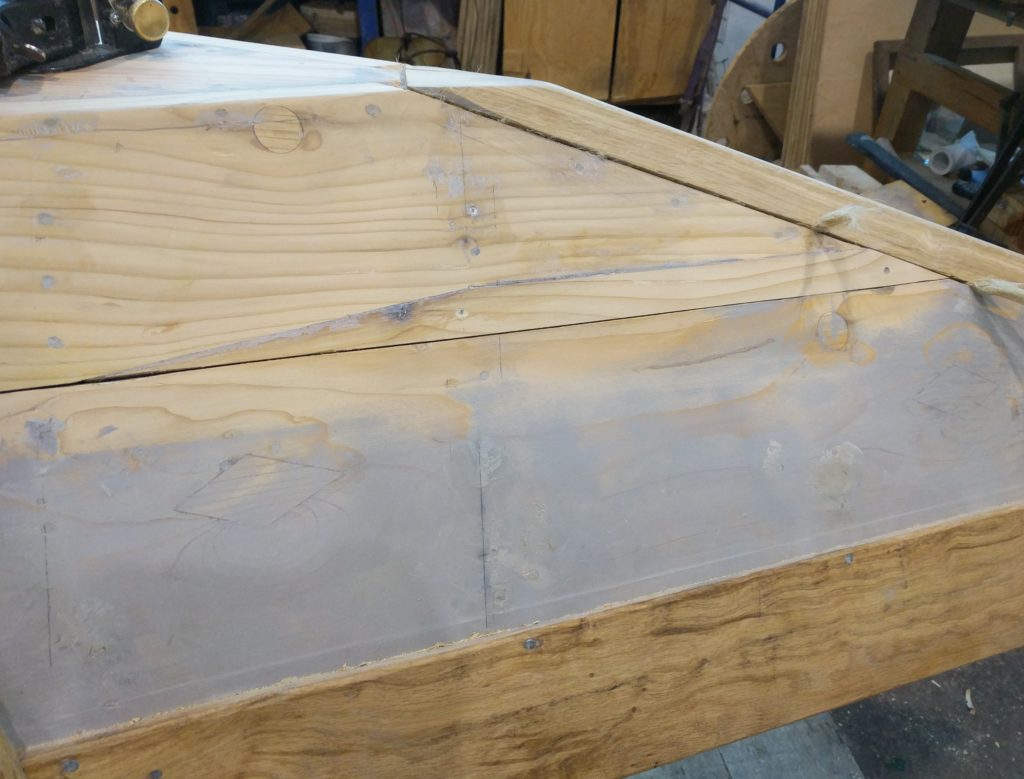
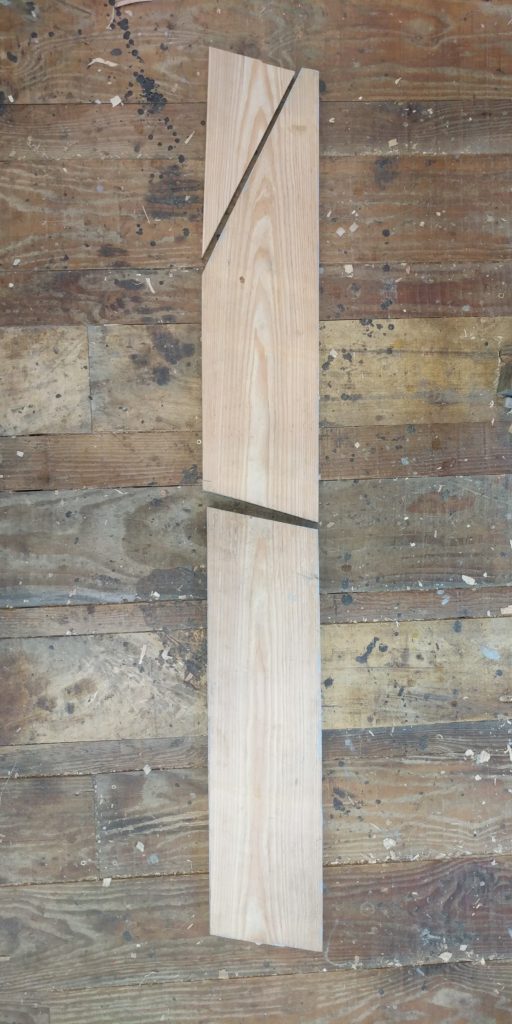
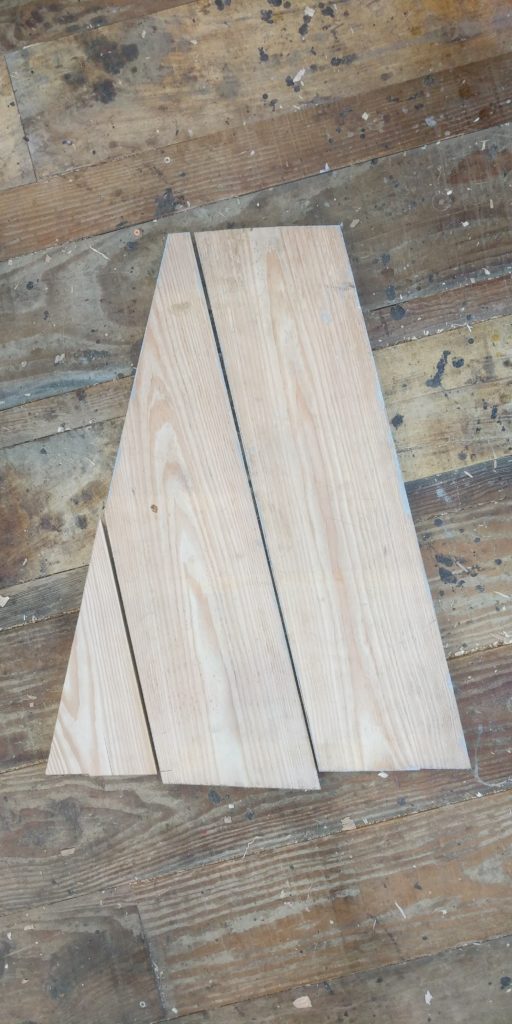
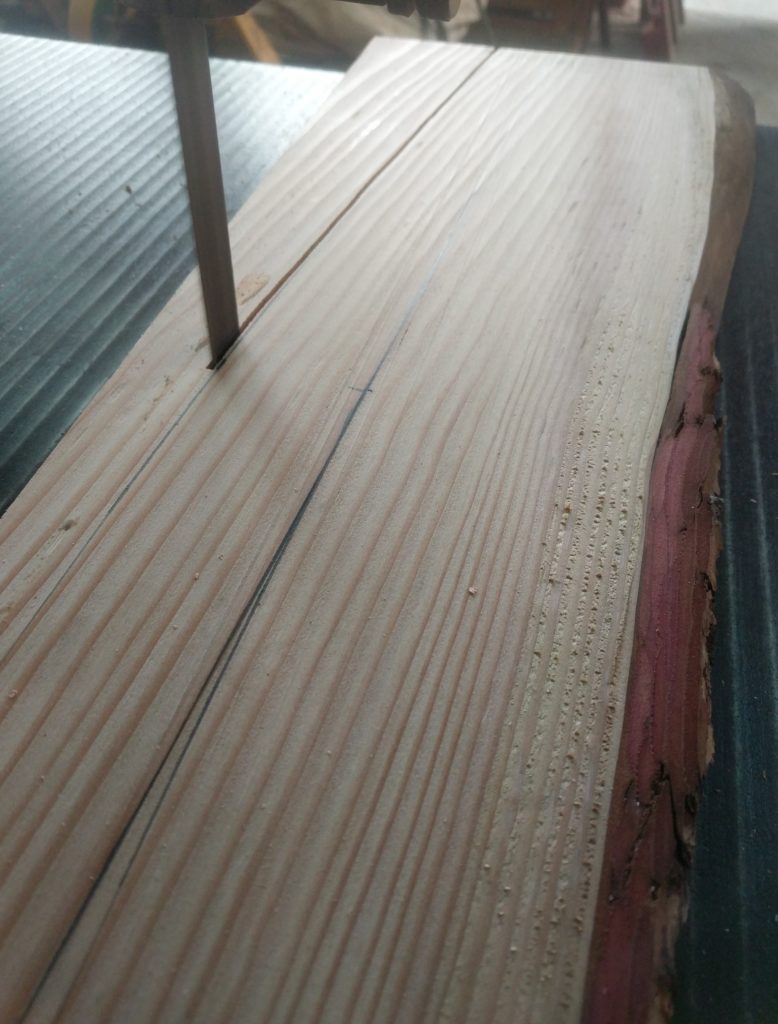
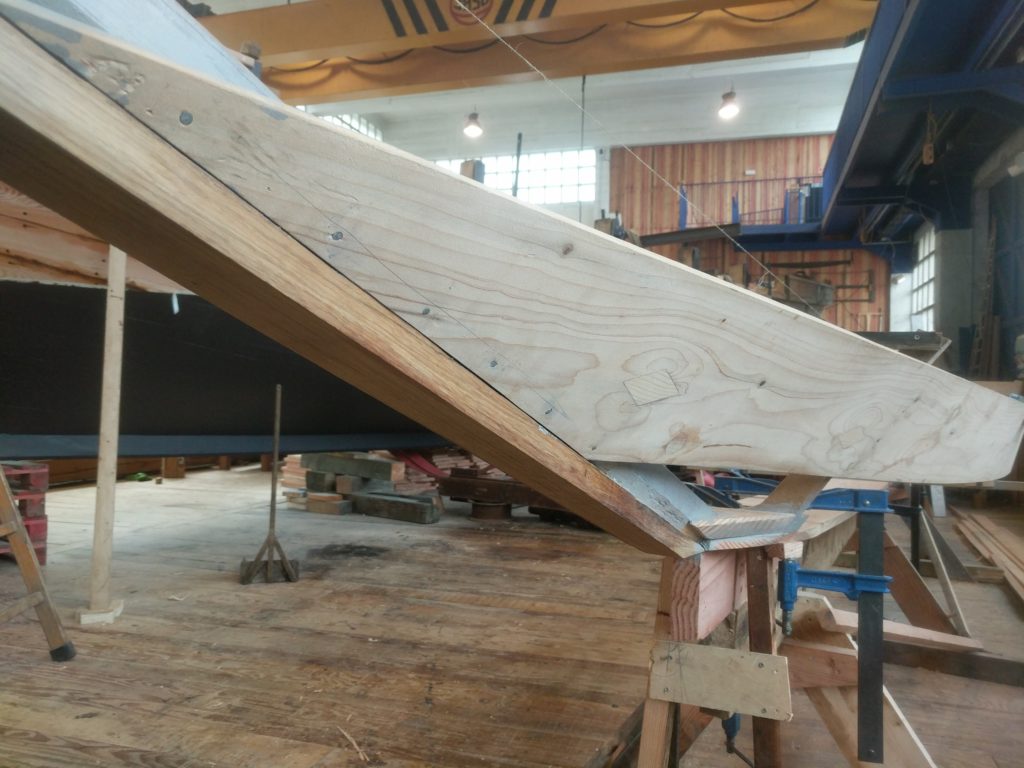
As you might have noticed, I avoided the modern, tapering-planks method in favor of a more traditional and efficient way of planking. I believe these two photos here below can explain more than a thousand words what I did:
Cut
Reassemble
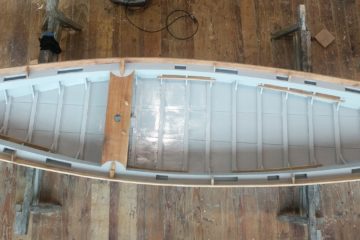
Here’s how a deck is traditionally made from a single plank in Venice.
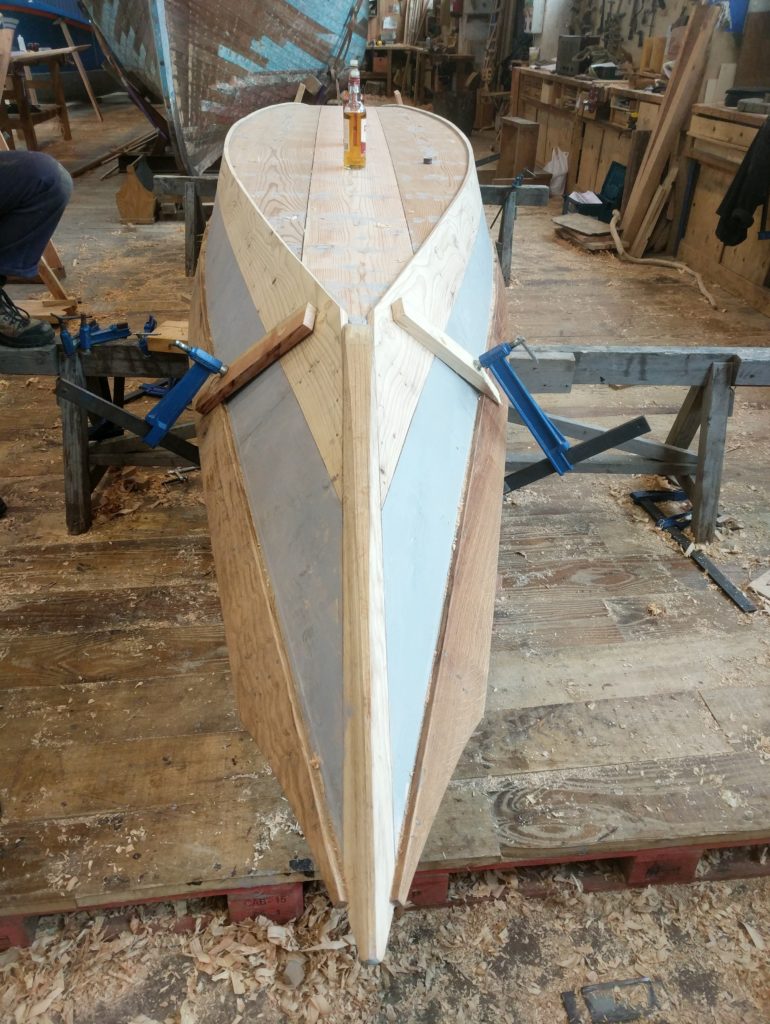
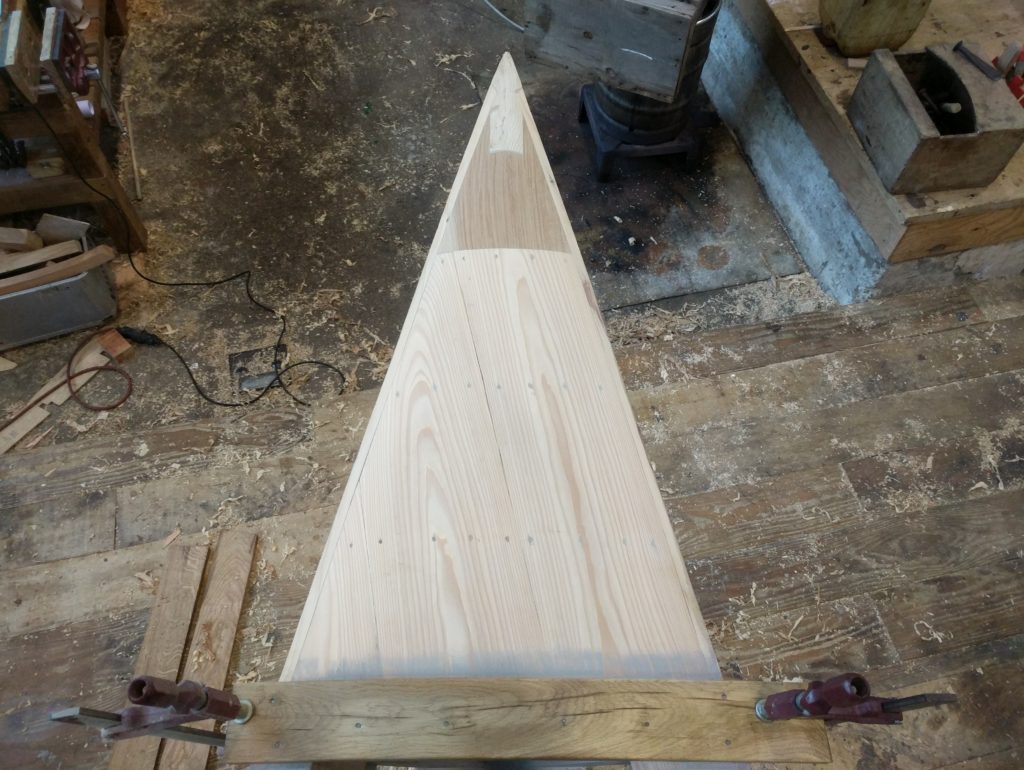
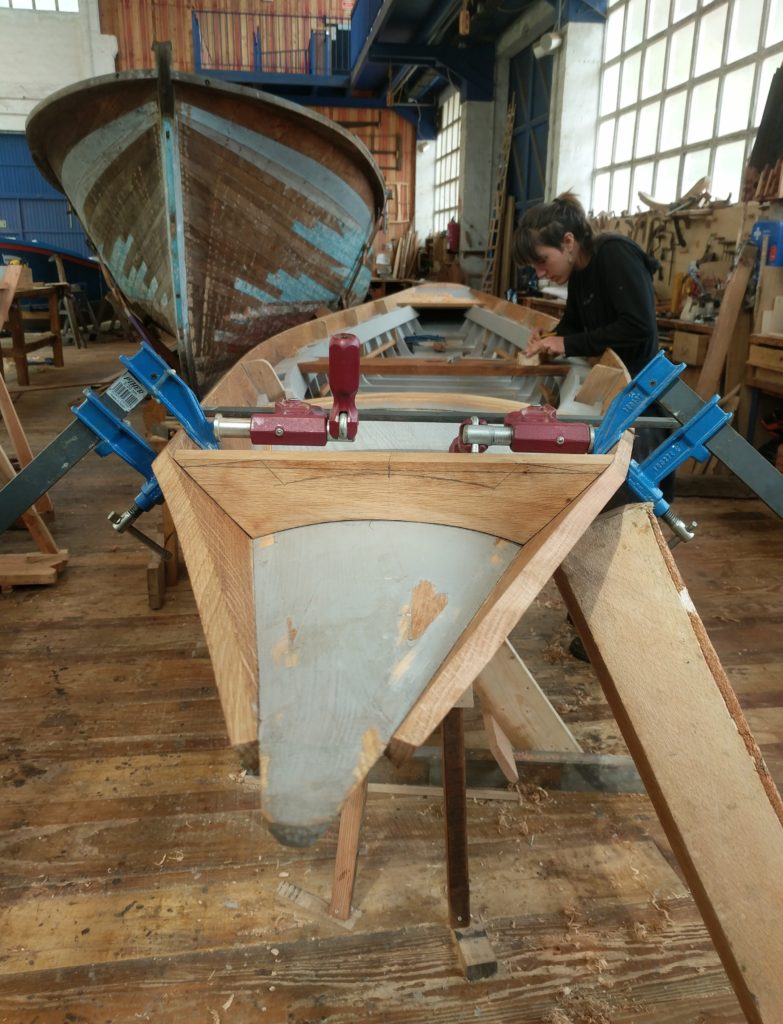
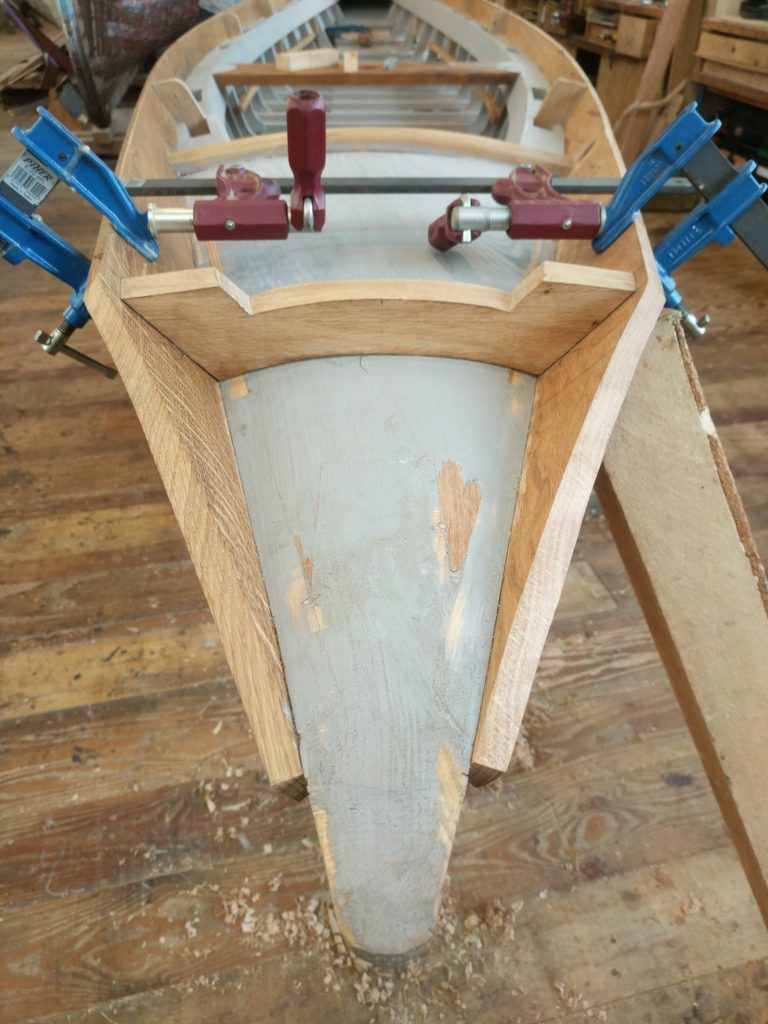
Here is the finished deck, with the planks cut flush with the breasthook. At the tip of the bow you can see the top of the stem, with two small triangles filling the gap on its sides. These are normally separated from the breasthook but Ioanna liked the idea of making them all out of a single piece.
I haven’t caulked it yet, but it might need to be if the planks shrink too much.
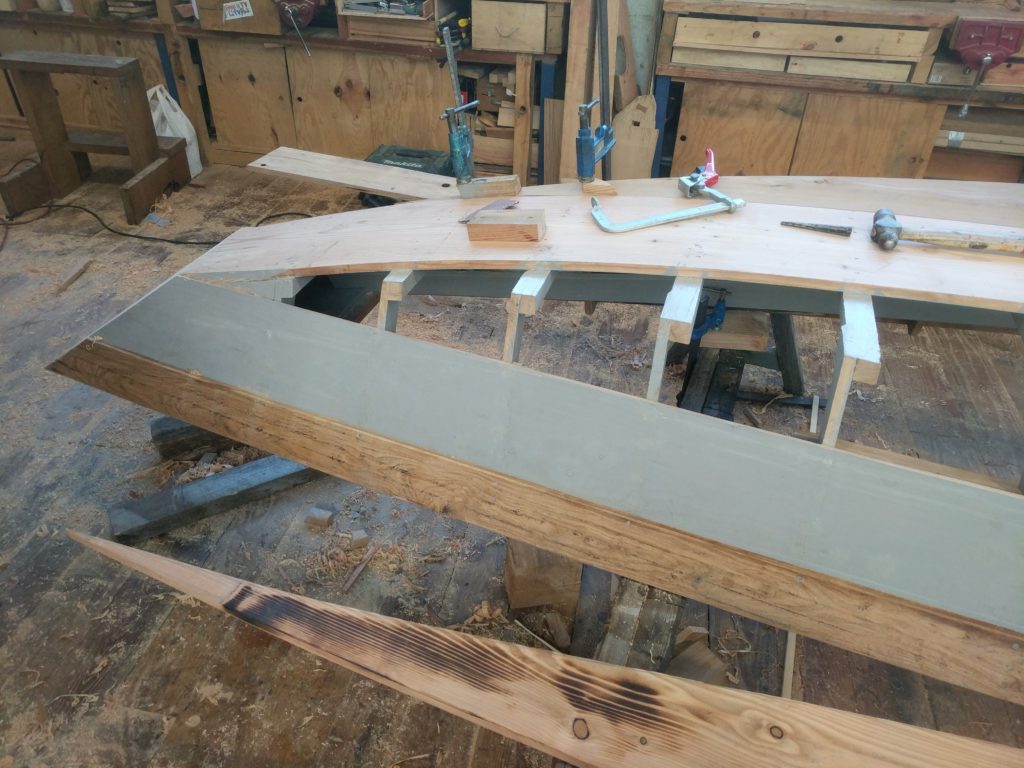
At the bottom of the picture you can see a cross piece made of oak, steam bent into place. In Venice it would be bent with open fire but we went for a method I’m more familiar with.
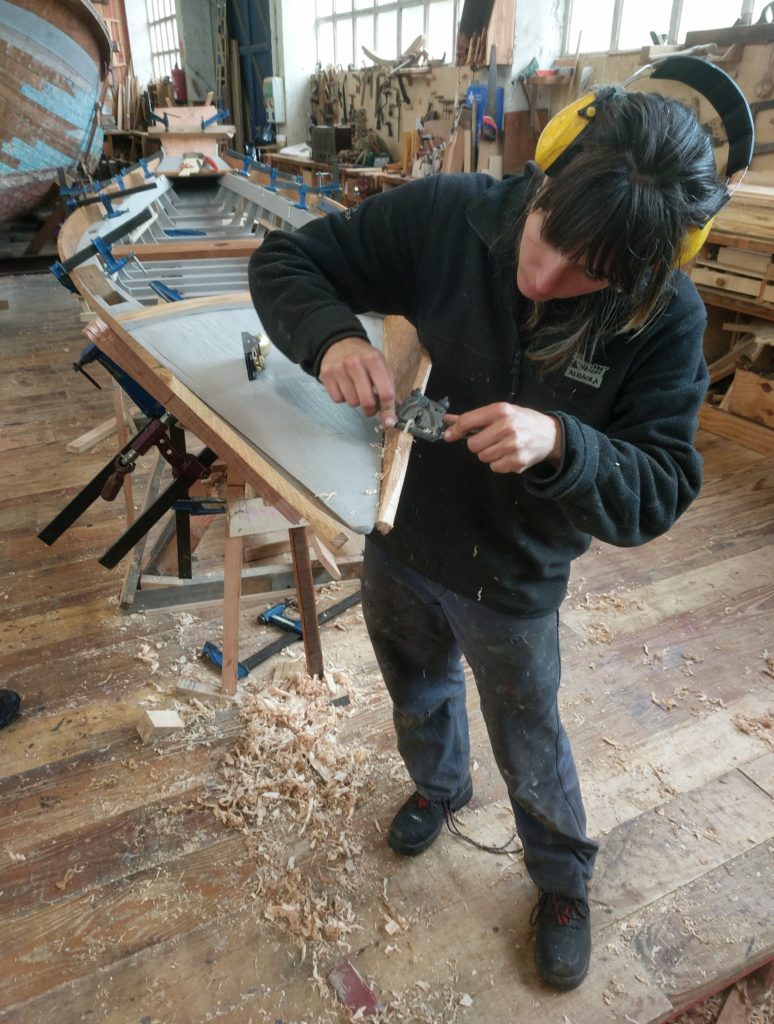
We then installed the two upper strakes called falche (waterboards in English maybe?). The overlap the sheer plank and are fastened mainly to stanchions and frames (but also into the thwart and the deck cross pieces).
Ioanna shapes the water boards
Making of the emme
The emme in place
On the thwart you can notice a prototype of knee, I forgot to photograph the final ones
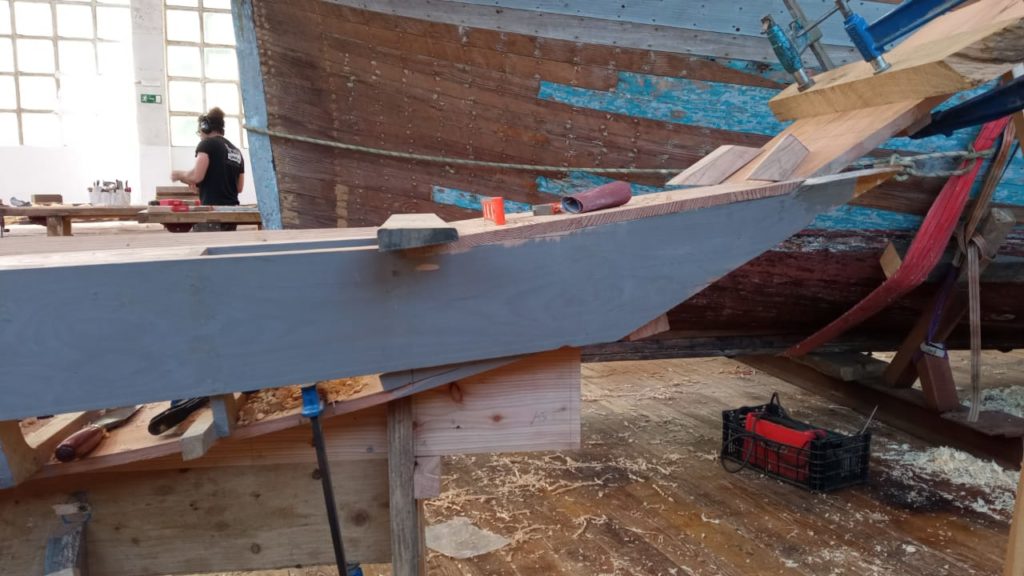
At the aft, the transom got its final cut, and looks very elegant now.
After fastening everything, it was time to flip the boat. We therefore dismantled the strongback, since we have no plans to build another sandolo here in the near future.
Now it’s easy to trim the bottom of the frames, flush with he floor timbers.
We also faired the stem and the filling piece at the bow, ready to install the side planks. These are almost ready, just need a few dutchmen and plugs on a few nasty knots here and there.
The extra width will get cut after they are fastened in their final position.
But the side planks are the last to be installed. First we need to close the bottom.
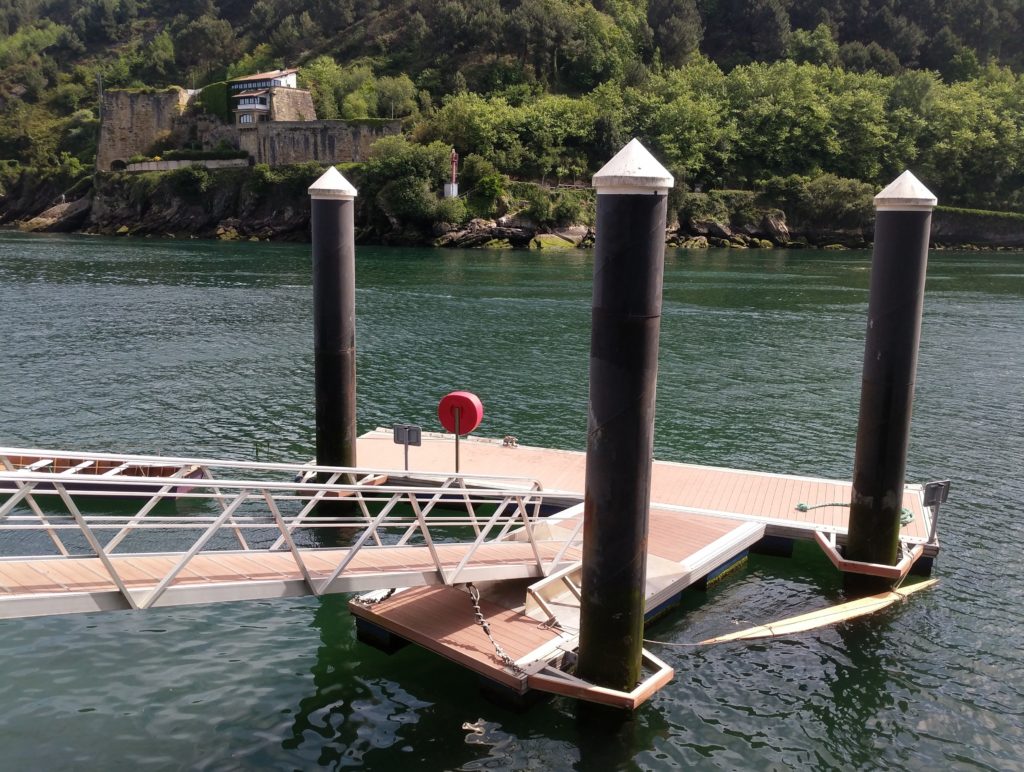
Since we were afraid the dry bottom planks would swell up once in the water, pushing the side planks out of place, we decided to soak them in the sea for a couple of days.
Such a nice weather, right?
I am not sure how they prevent this from happening in Venice, but I’ll try to find out. That’s it for this week, see you the next one, hopefully with the boat ready to be painted!
After all these distractions, we could get back to work. Ioanna started by caulking the aft deck she had installed last week.
We used oakum instead of cotton string, in order to follow more closely the traditional way.
This might need to be redone after the boat sits under the sun for a while, but we thought that the caulking would prevent the deck planks from warping too much while still out of the water.
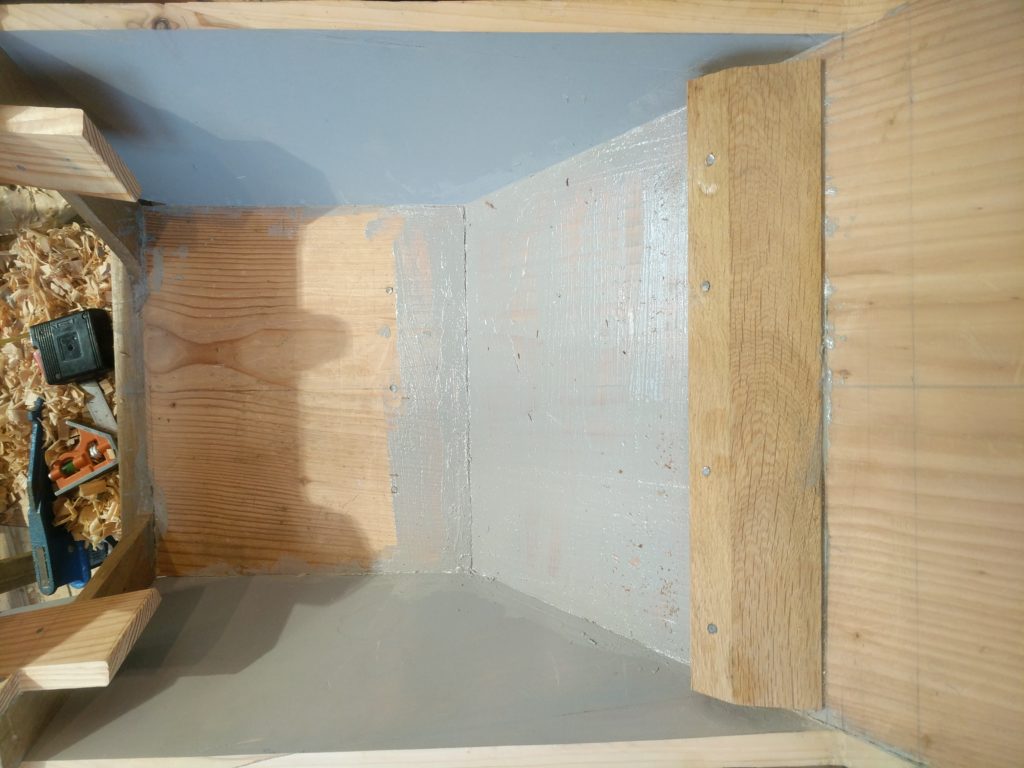
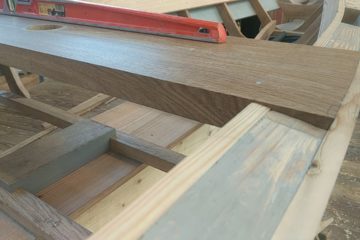
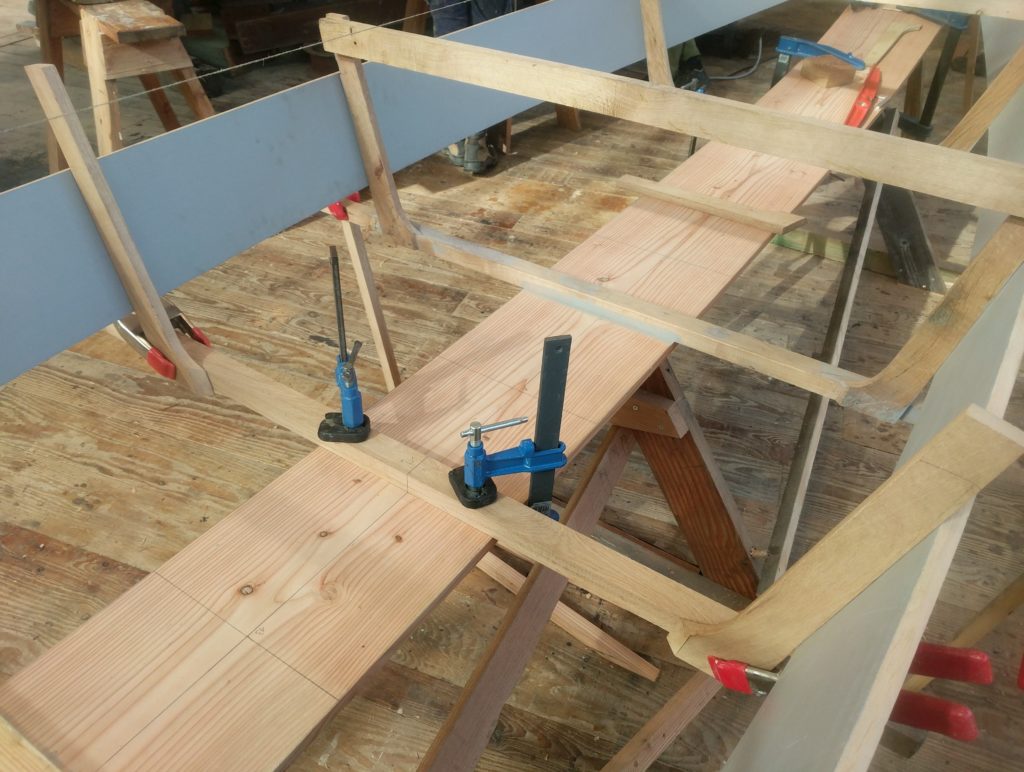
Then, together with Alejandro, they managed to prepare four out of five of the sotocorboli, the pieces that will receive the foot of the forcole and prevent them from rocking while rowing.
They have quite a complex shape, as you can see from the one in the bottom right.
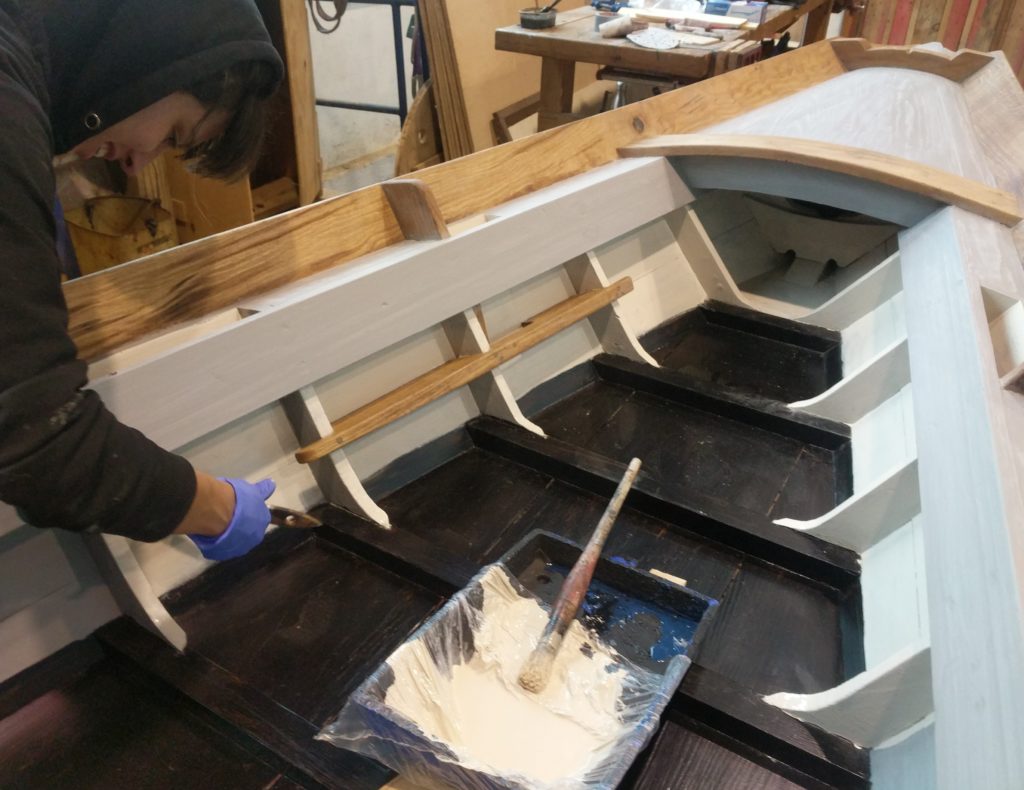
Also notice that we painted the interior with some primer, after Ioanna had sanded everything.
This is how the thwarts are traditionally painted, in Venice but also here in the Basque Country.
Regarding this semicircular patter, I was once told that it is a reminiscence of the times when boats were covered in tar. You wouldn’t want to stick to the tar with your “clean” trousers, especially in the summer when it all melts. Therefore the seats would be left without tarring.
We followed the tradition, and oiled the thwart instead (with a mix of boiled linseed oil and turpentine).
I devoted my time to the closing of the forward deck. Ioanna had prepared the breasthook last week, but kindly left it to me to finish.
After installing the first beam and cutting a rabbet on the socheto (breasthook), I positioned two more beams in between with the help of a batten. The beams have been made out of larch, as will the deck.
As you might have noticed, I had the two smaller beams seated too low and decided to glue two small strips on top of them to reach the right height. I was just too lazy to cut new ones.
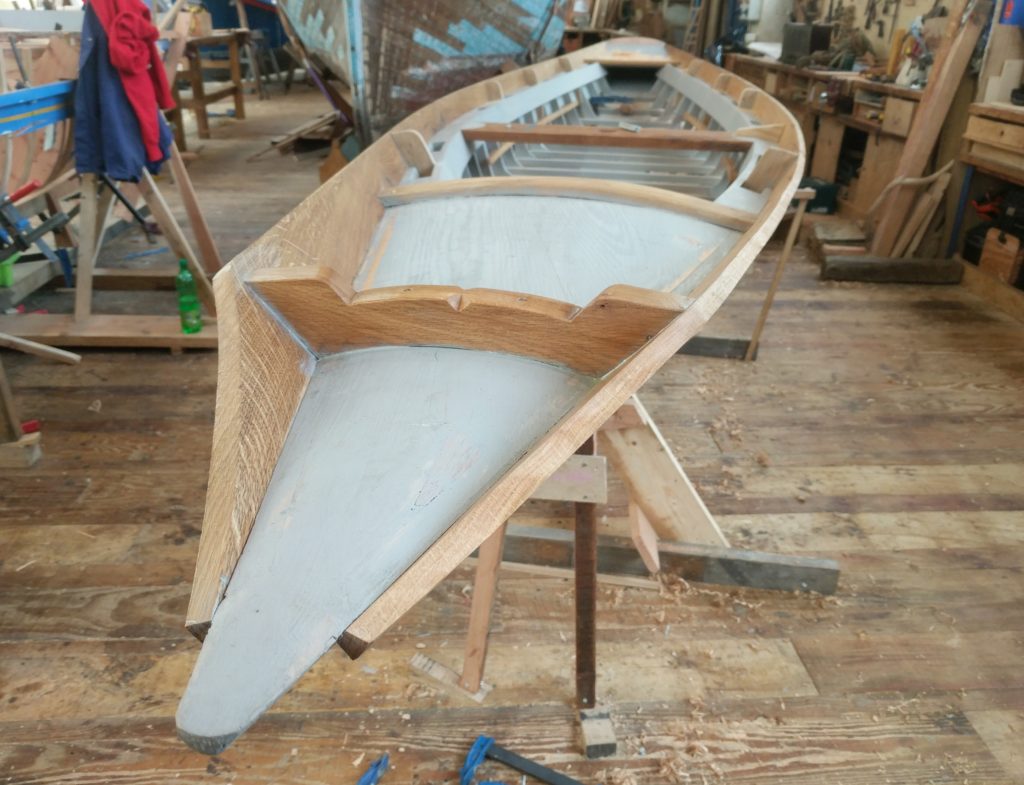
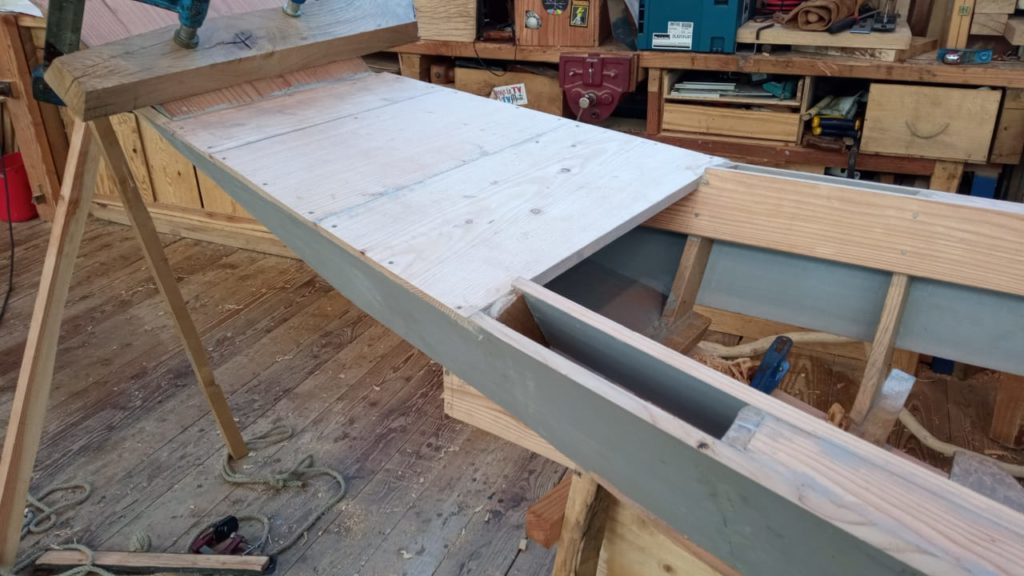
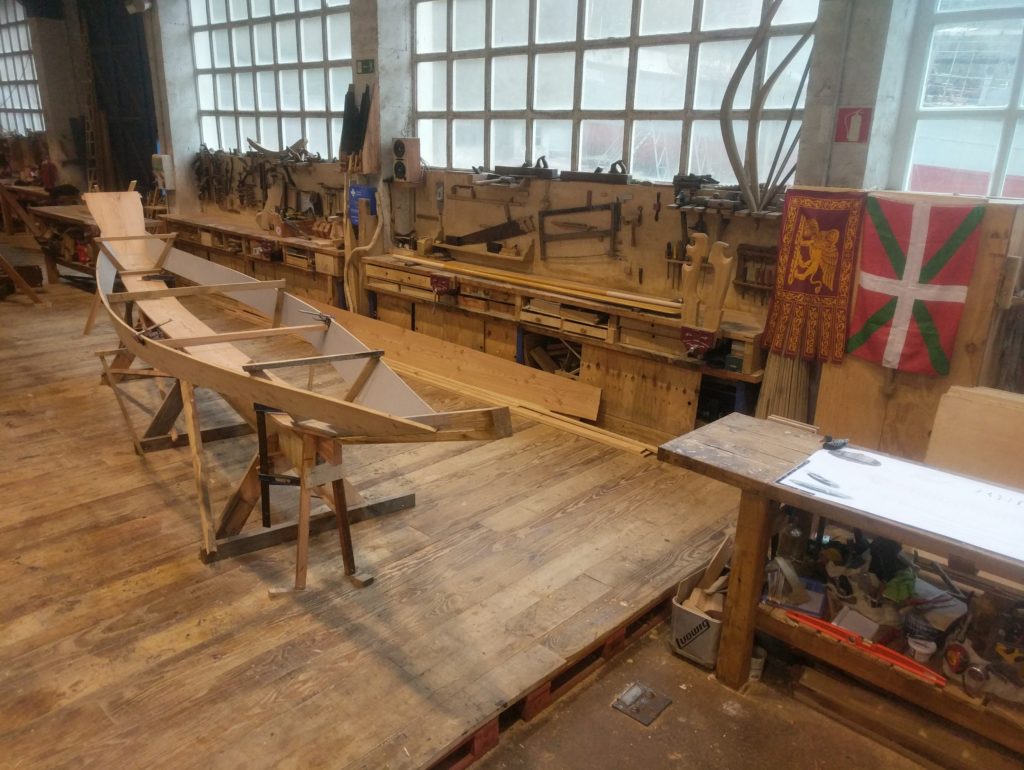
In this group picture, you can see how the deck turned out. It still need to be fastened, but you can already notice that it is asymmetrical. It’s been made the traditional way, in order to waste as few material as possible.
The new neighbor is a fishing boat called Zardara, whose faith is still uncertain.
After fastening it I will take some more pictures and explain more in detail how it is done.
What’s the plan for next week?
Nailing the forward deck, hanging the washboards (you can see them in the last picture, lying on the floor next to Laguna), fix the stanchions supporting them, fasten the sotocorboli, cut the transom, and maybe even flip the boat and start closing it for good!
A bit unexpectedly this week I have been to Venice. I took advantage of this opportunity to photograph lots of boats, both under construction and moored along the city’s canals.
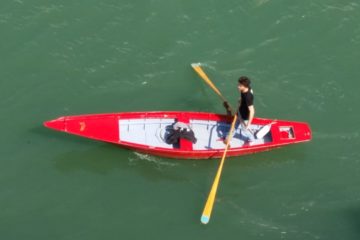
Of course I have been rowing a sandolo, too. This one is called “Miss K”.
Needless to say, it was wonderful. Especially now that there are almost no tourists because of the pandemic.
Meanwhile, in the Basque Country, the work on “Laguna” didnt’ stop. Ioanna and Alejandro kept on going and finished the aft deck and all the stanchions.
There are different ways to build the decks, here is how we decided to do it:
The aft-deck planks are actually notched into the plank on the forward side, in order to give the deck some more steepness.A cross piece at the aft end prevents the transom from cupping and helps supporting the deck as well.We nailed the deck planks straight into the edge of the planks, even though they often are nailed into another piece next to the plank.At the end, a piece is placed on the connection between deck and “gunwales”, to protect the edge of the deck and visually ease the transition between the two different bevels. We also added two small triangular pieces to the planks in order to have an extra-raked deck.
All this seems quite easy and straightforward, but has all been coordinated via messages on Whatsapp and phone calls. Luckily in Venice I had access to many boats and books that I could take pictures of and send to my team.
Our invaluable volunteer helper Alejandro worked on the stanchions (mancoli), which we decided to make slightly taller than the original boat, in order to have a higher washboard (falca), and account for the mistakenly low sides…
Before
After
Ioanna has also been working on the breasthook (sochéto), but I’ll post more pictures of that next week, together with the other deck.
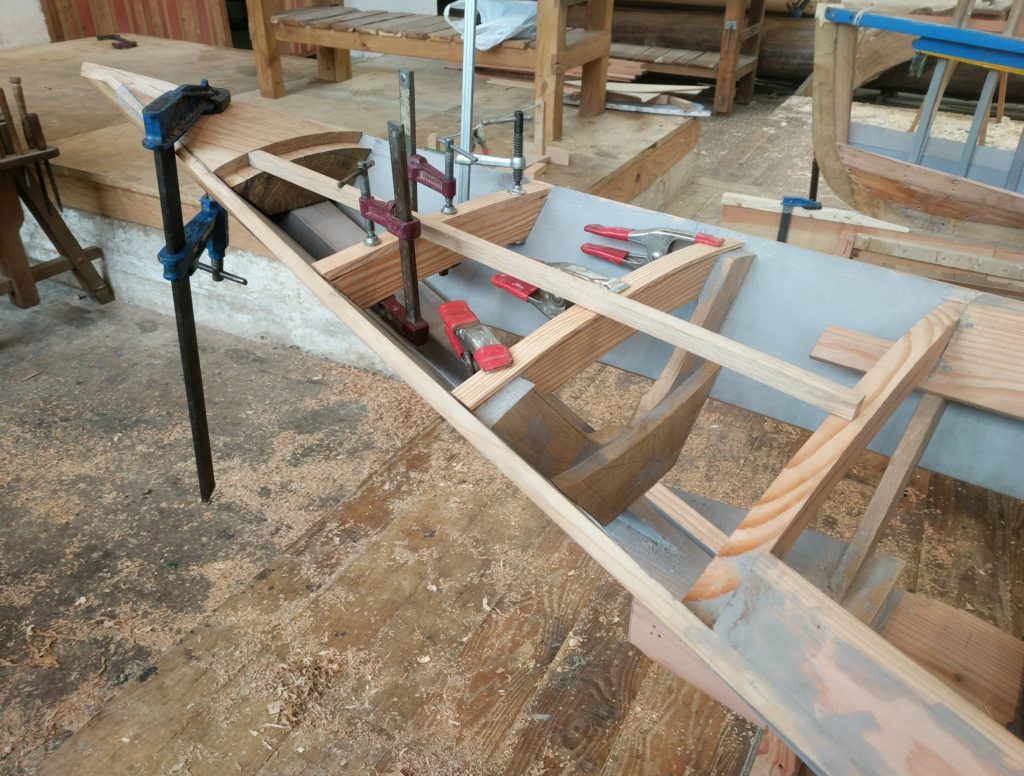
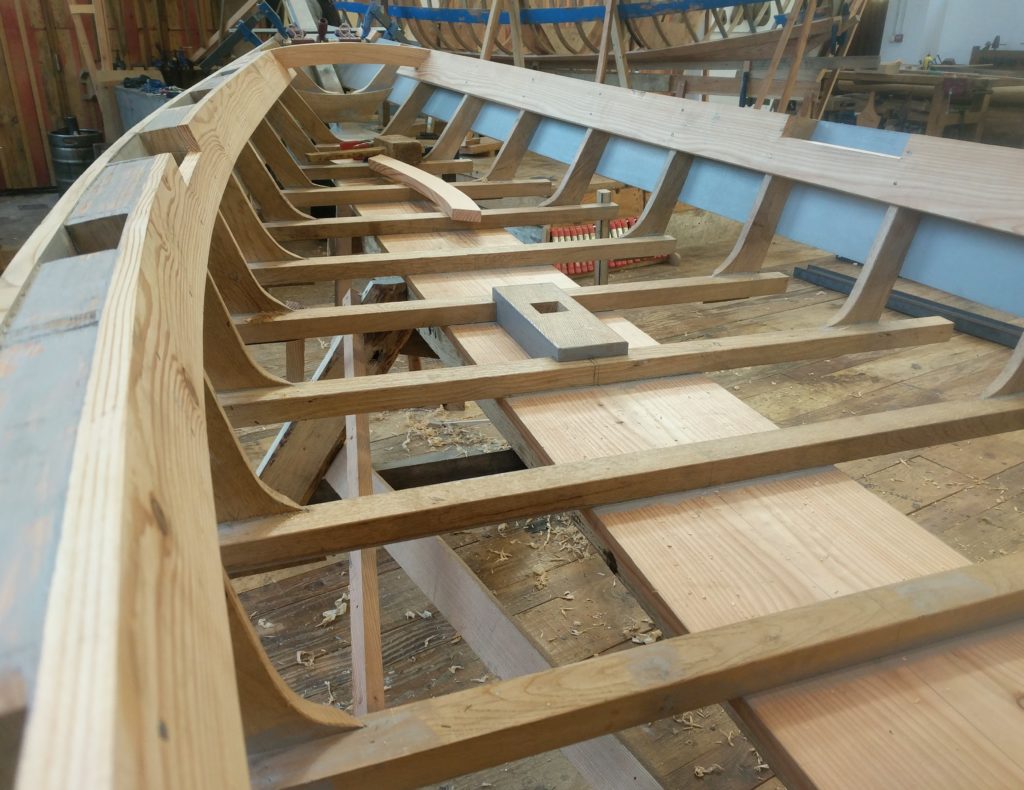
Normally, the spaces between two frames and seat-riser and outside plank are filled with larch blocks. There is no gunwale on the sandolo s’ciopon and the blocks help strengthen the whole boat.
Usually, every other space is left empty in order to be able to tie a rope around the seat-riser when mooring. This is especially useful if you think that there is no stringer either on this kind of boat.
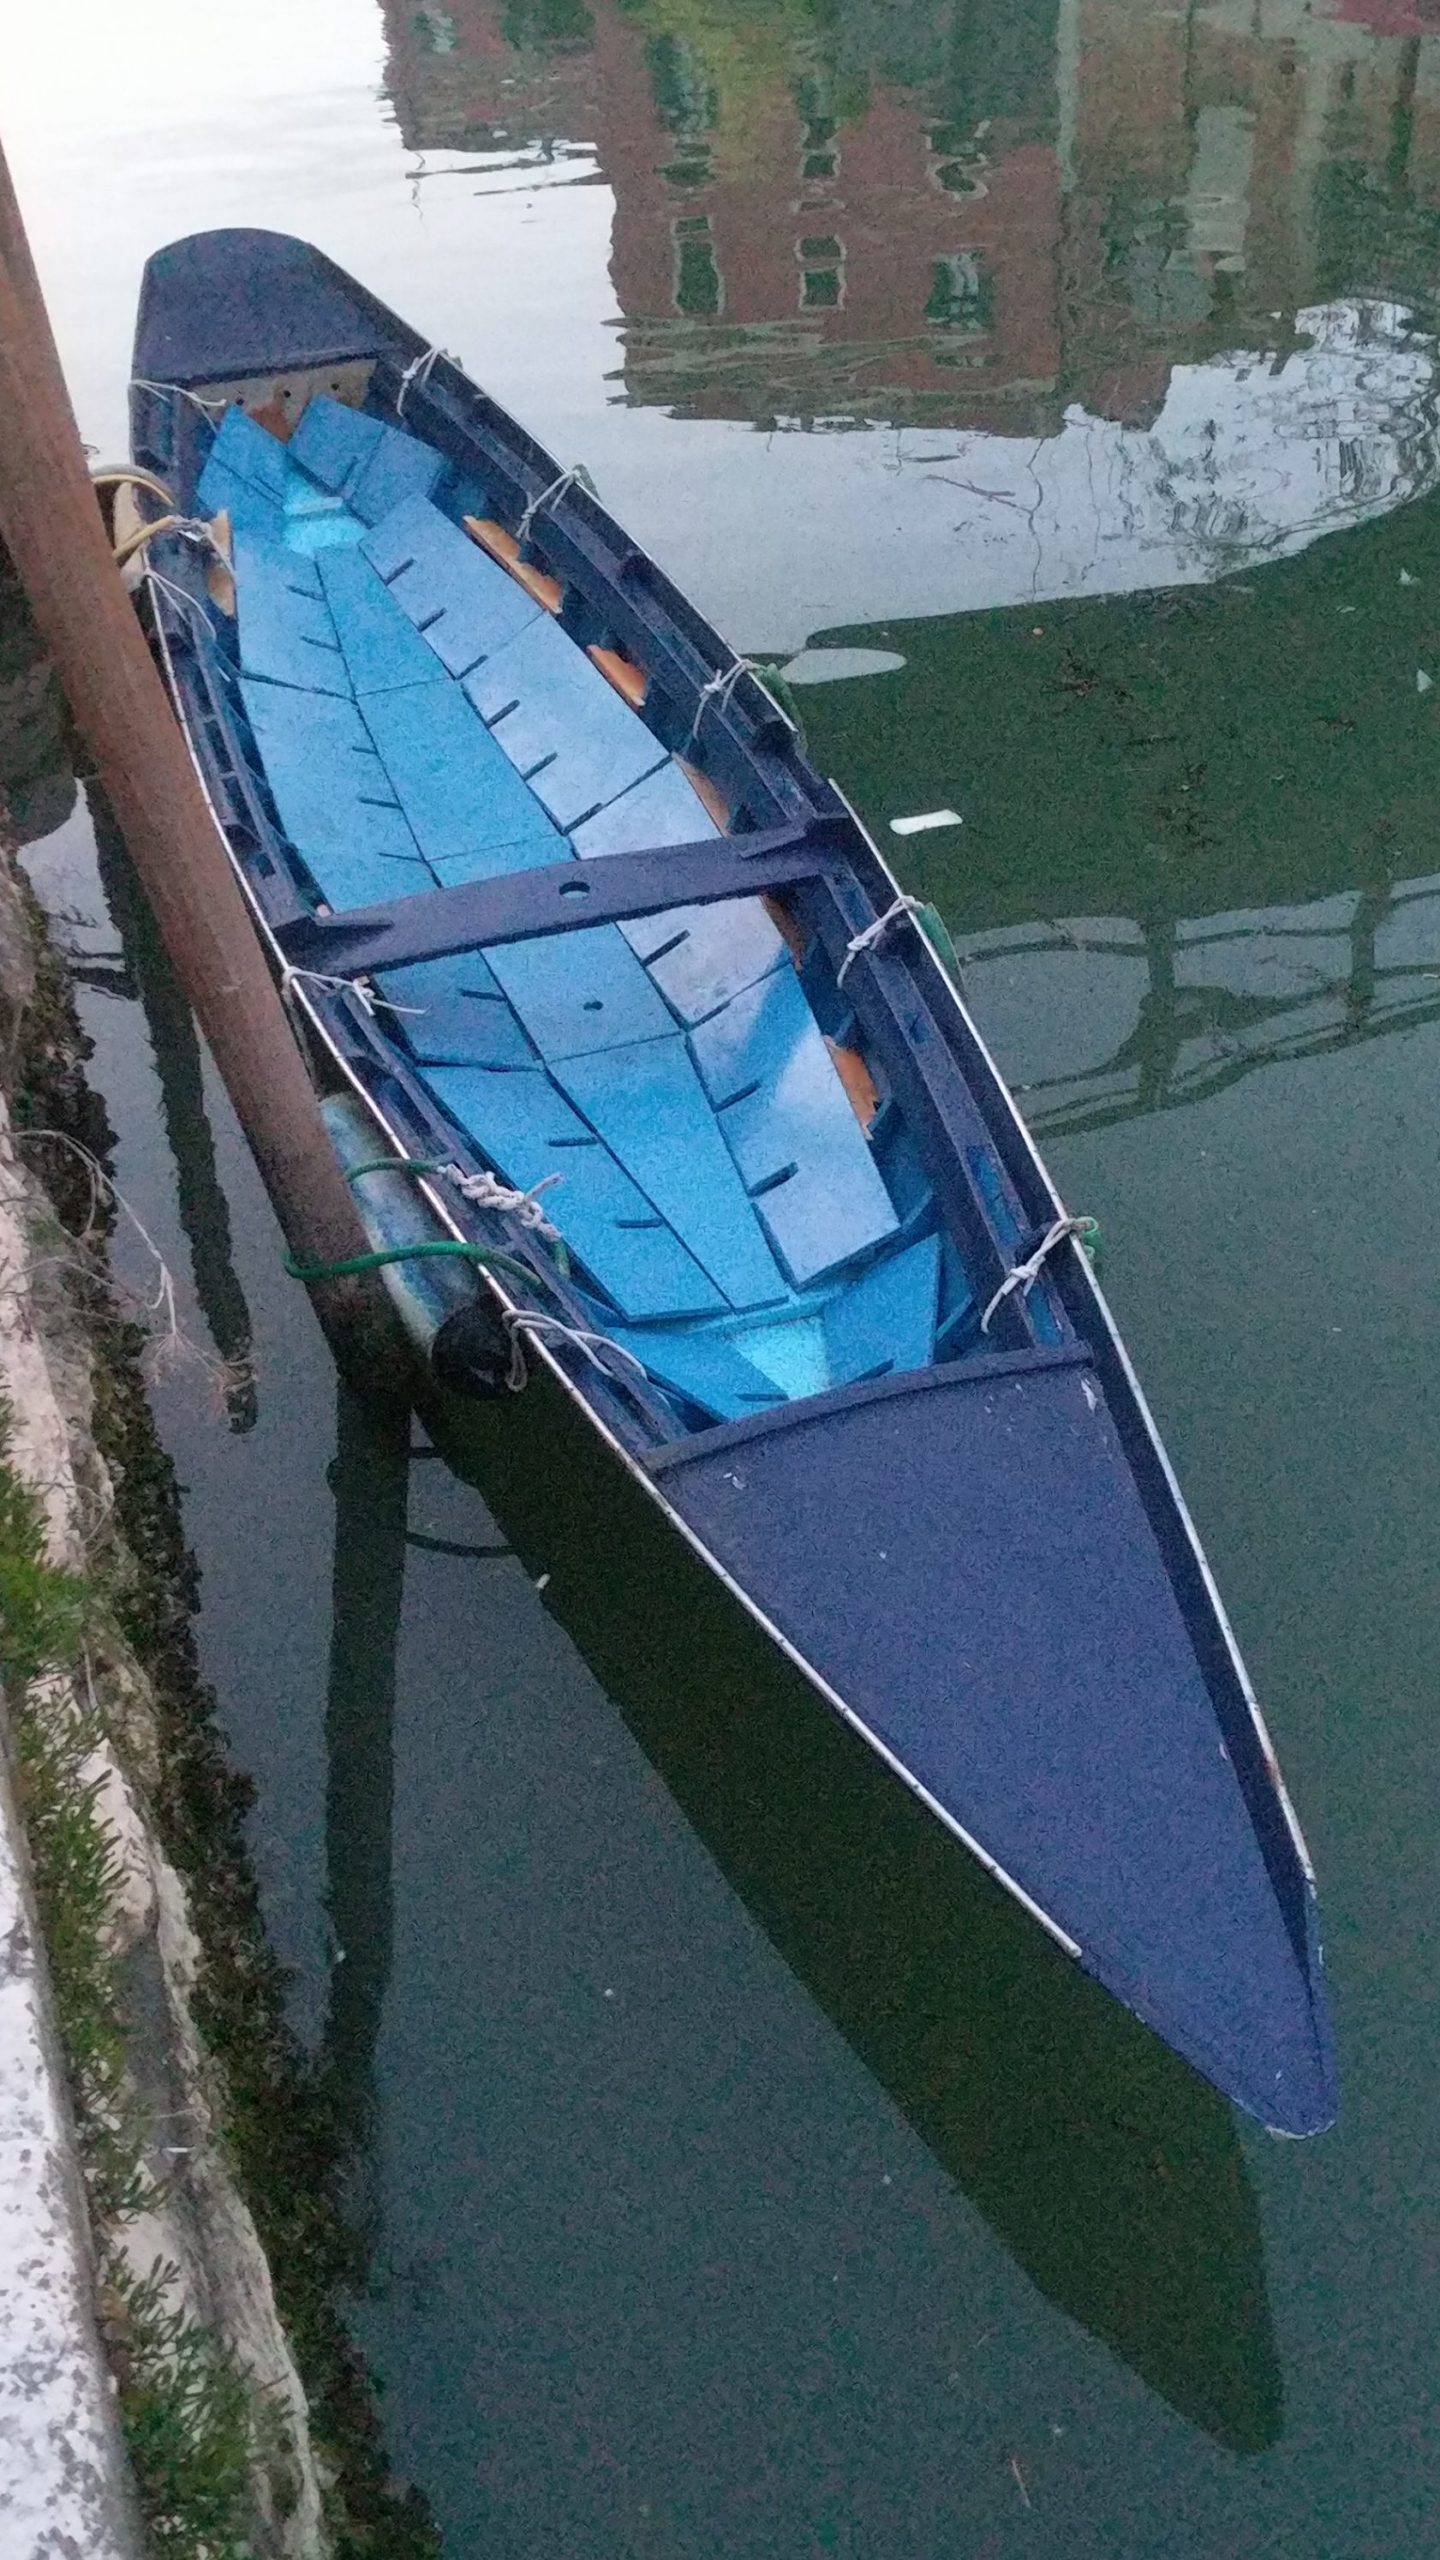
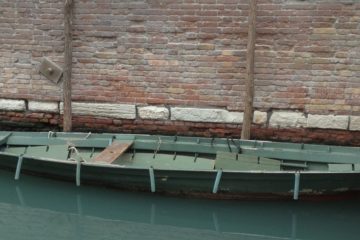
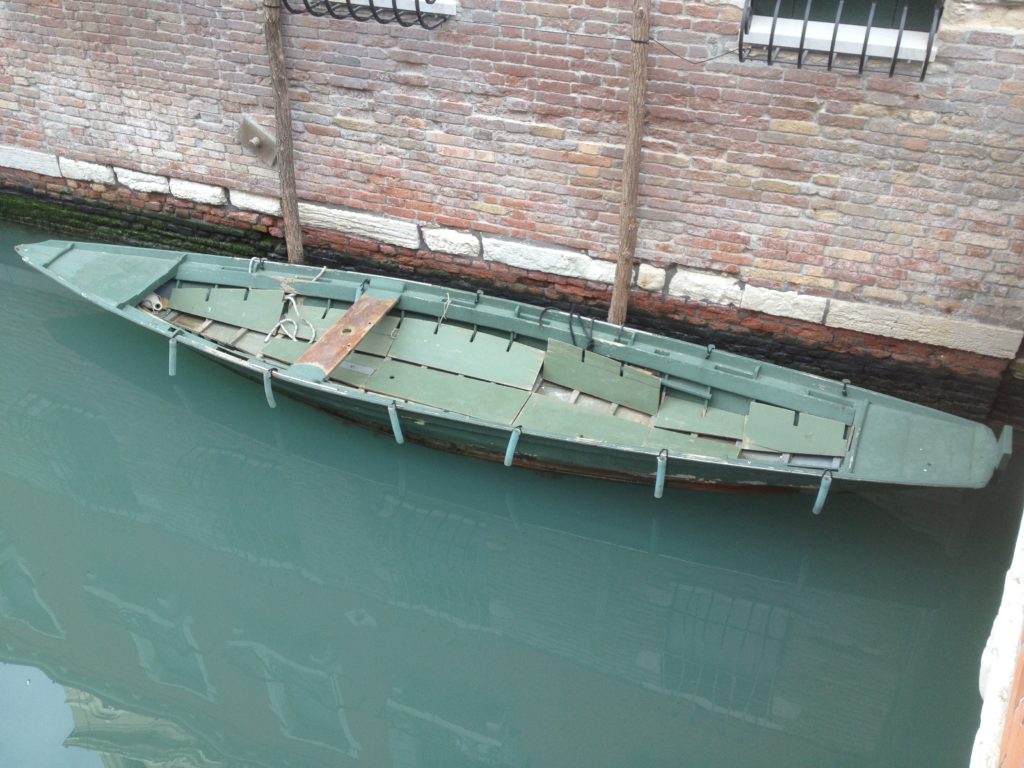
Here is a picture of another s’ciopon in Venice. Excuse the low res, it came via Whatsapp.
These blocks are traditionally fitted after the seat-riser has been fastened, but we decided it would be easier to fit them before.
We found out later that usually they are only about half the height of the seat-riser, unlike ours.
We also finally installed the last frames, which sit directly onto the stem and don’t have a proper floor timber.
Since they are hidden under the deck, many times they are not even cut like the rest of the frames, and square pieces are used instead. But we had a couple wrong frames left from the previous weeks and decided to recycle them.
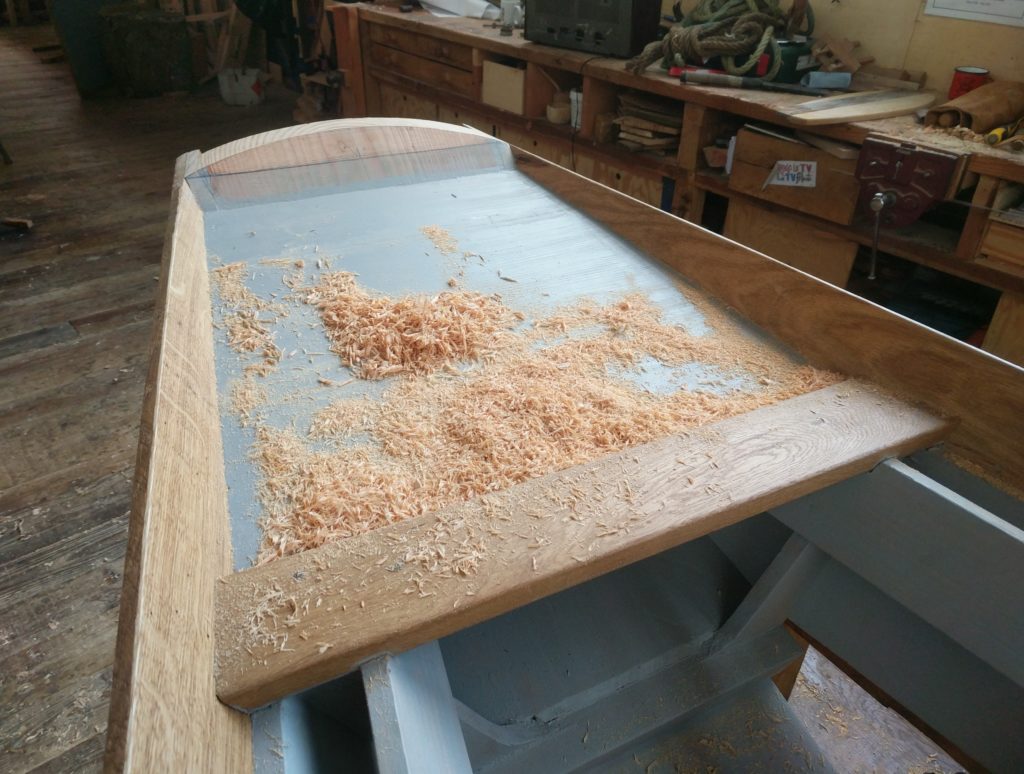
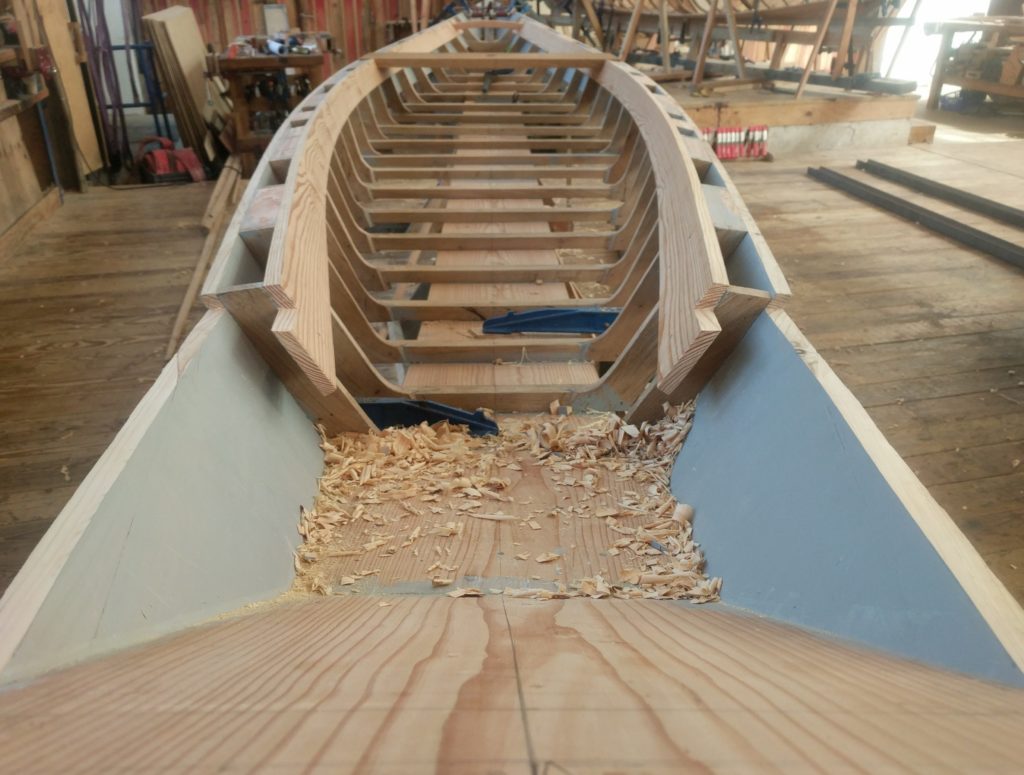
Everything nailed into place: the shavings around the boat come from fairing the top edge of both plank and seat-riser.
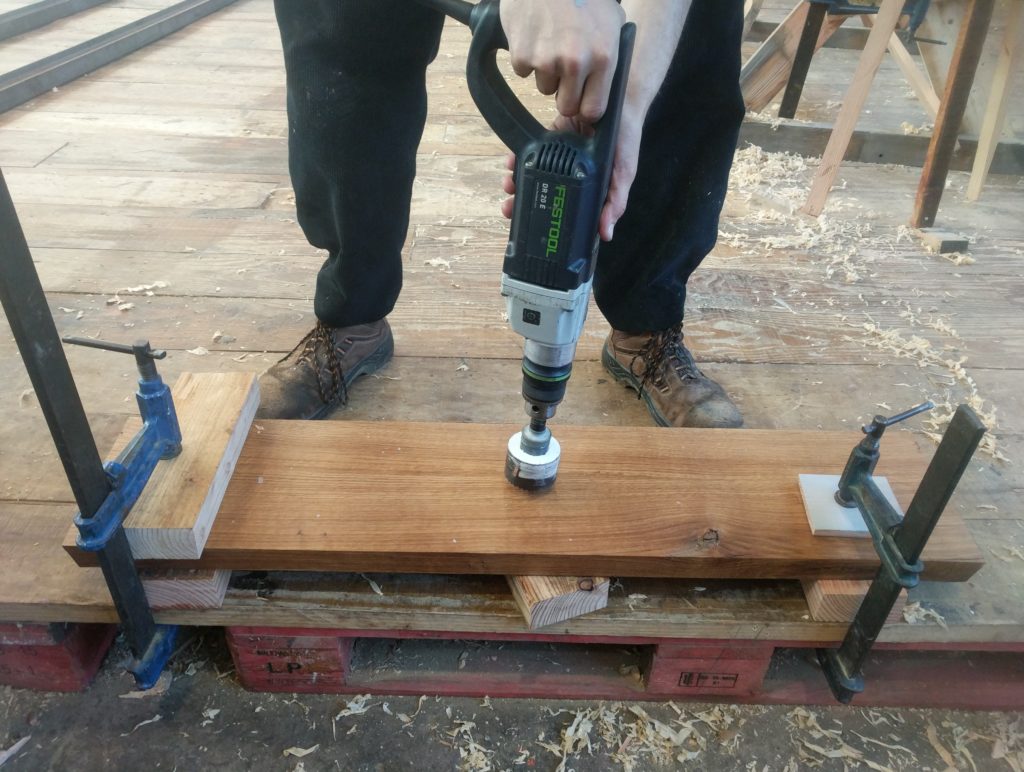
Alejandro, a volunteer interested in applying for the Aprendiztegi, has been helping us this week, therefore we managed to get a lot of work done.
What do you mean you don’t know what’s the Aprendiztegi?
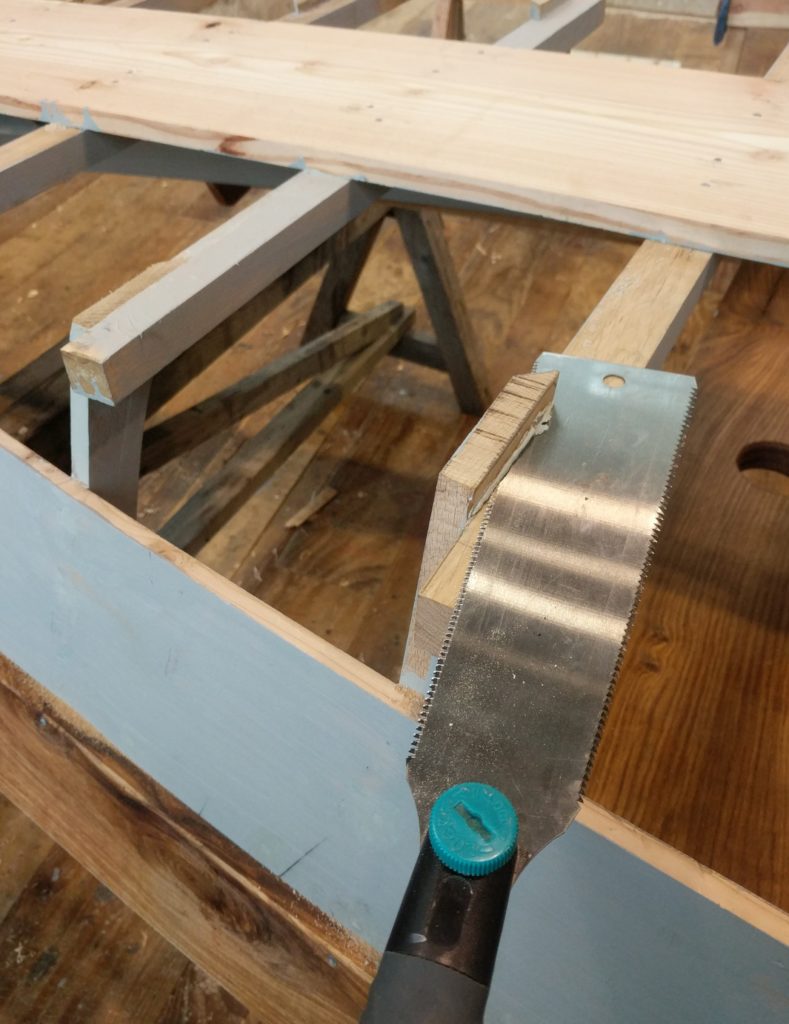
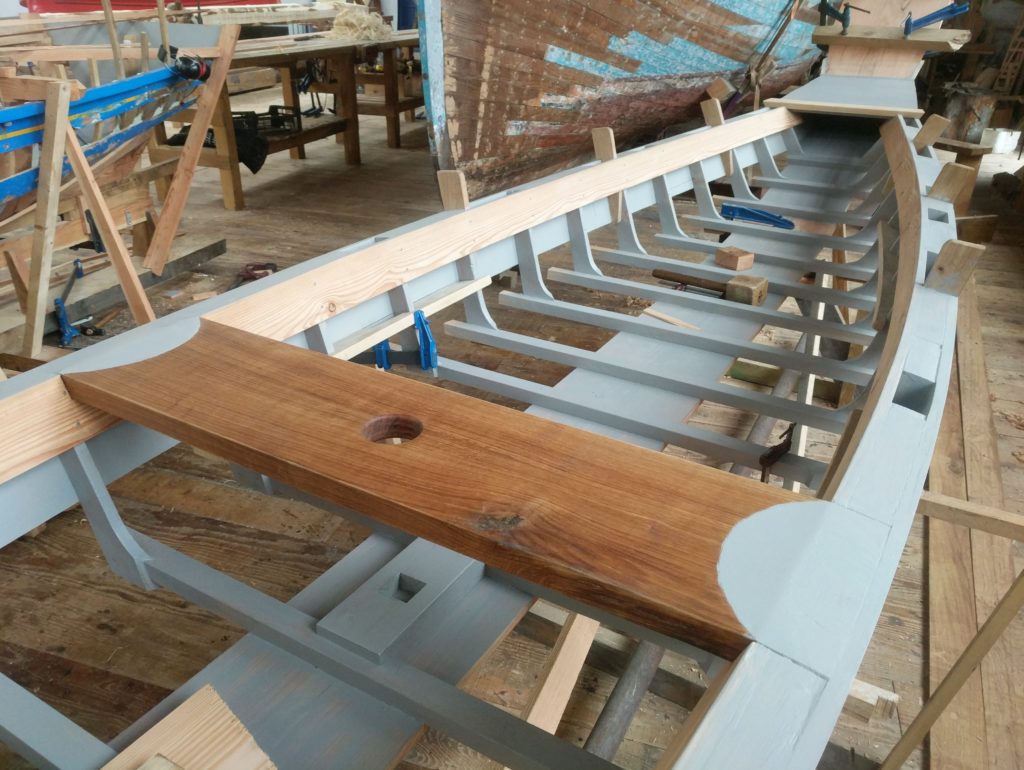
Here he’s drilling the hole for the mast in the center of the thwart he has been preparing.
We were lucky enough to find a hole saw with the same diameter of the smallest mast we have in Albaola.The seat-risers get cut in order to notch the thwart, and a hole is carved into the mast step in order to receive the mast.Then the sides get planed flush to the planks, and nailed from the outside of the boat into the end grain of the thwart.
Next week we’ll focus on closing the decks, plus some other little things… Stay tuned!
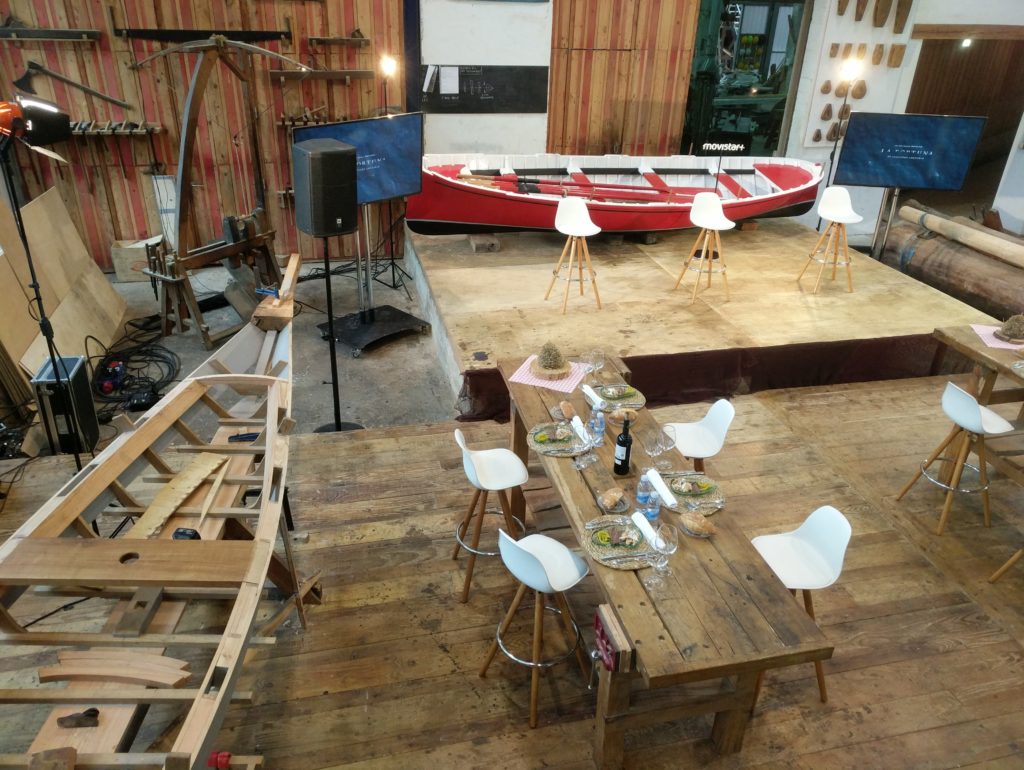
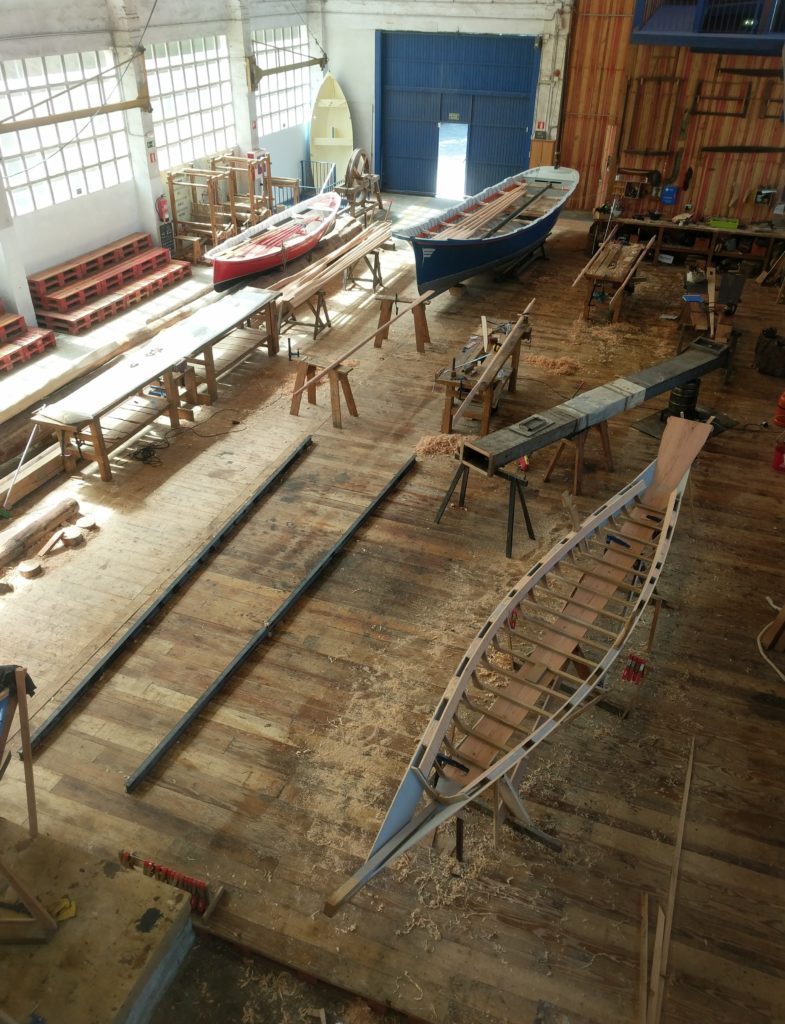
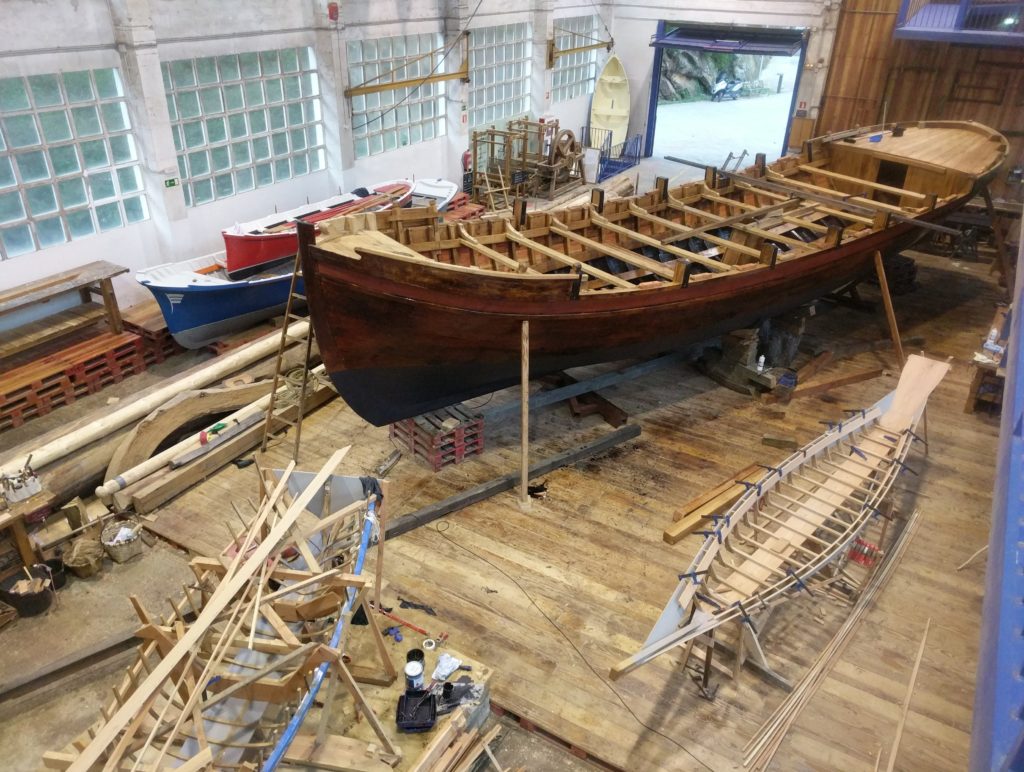
This week was all devoted to the preparation for the launching of the patatxe.
A patatxe (we use the Basque spelling here: https://en.wikipedia.org/wiki/Patache), was a light sailing vessel with two masts originally used for patrolling the coastline, especially in this area close to the border near .
Patatxes later took part in trans-Pacific expeditions and because of their speed and versatility they were soon favored by pirates as well.
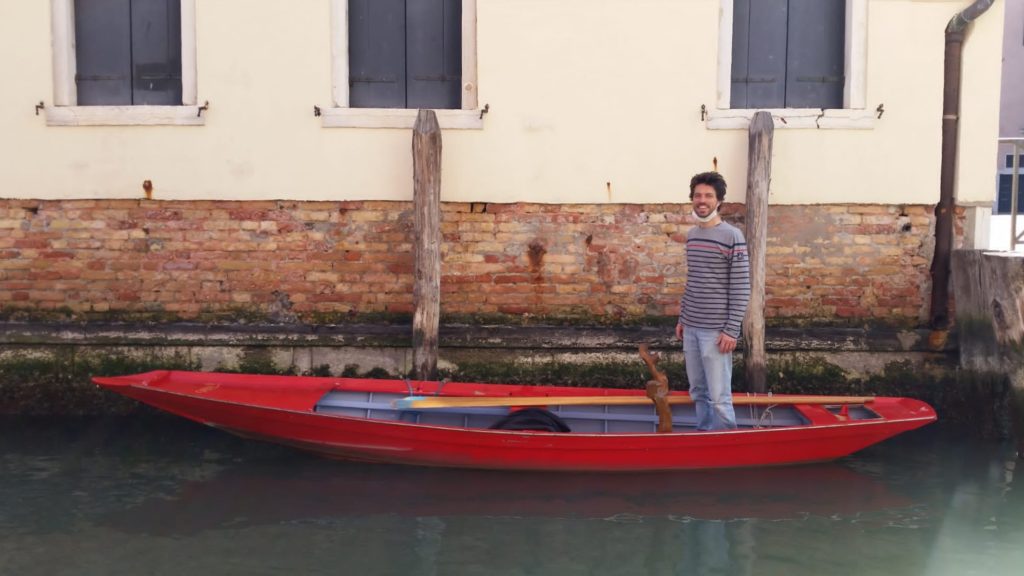
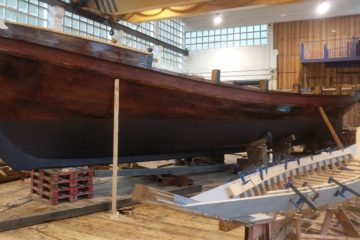
Here she is: oiled and tarred, and ready to go
The launching went well, and we now have plenty of space in the workshop! Now back to the sandolo.
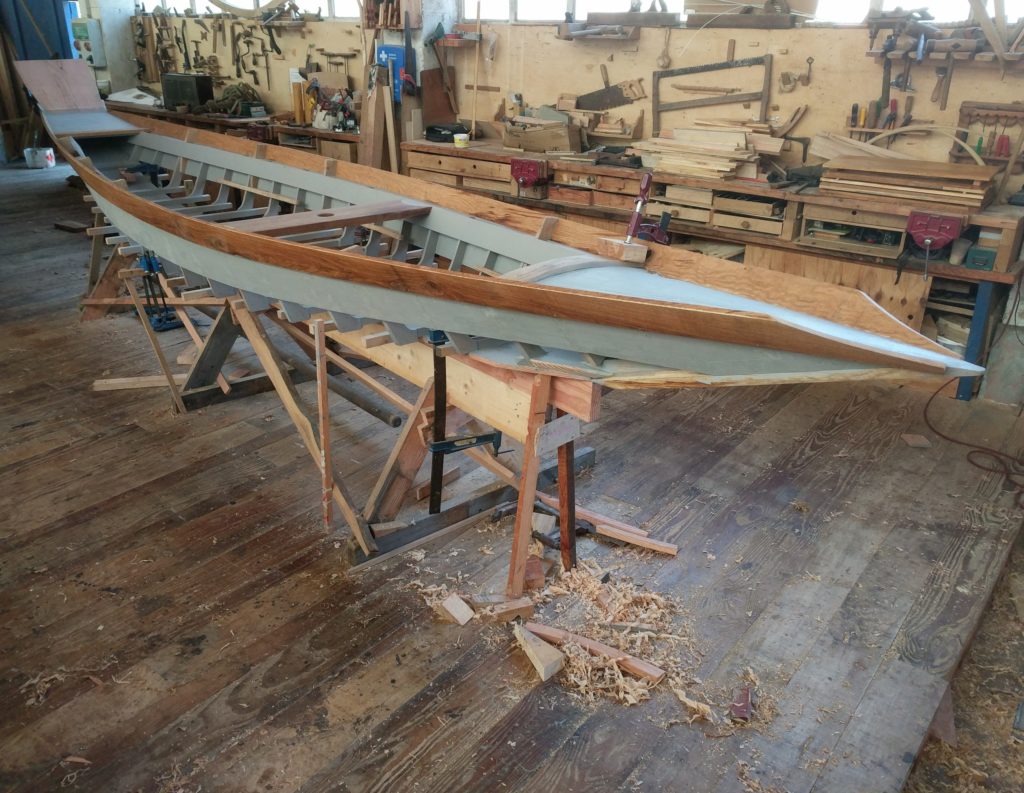
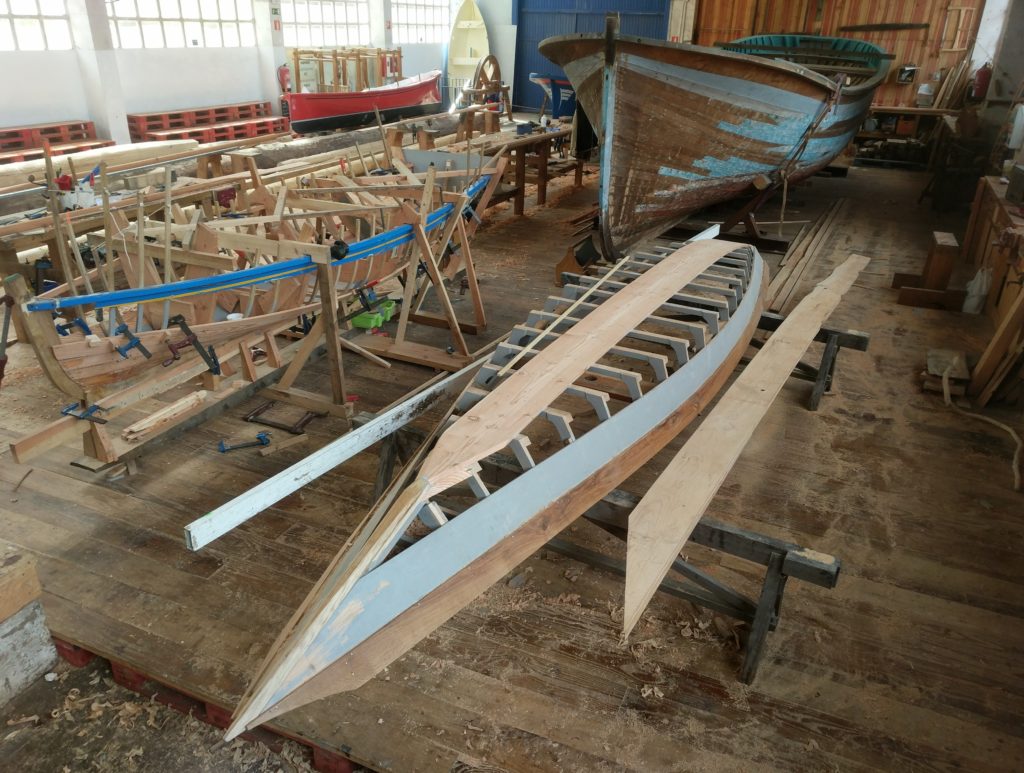
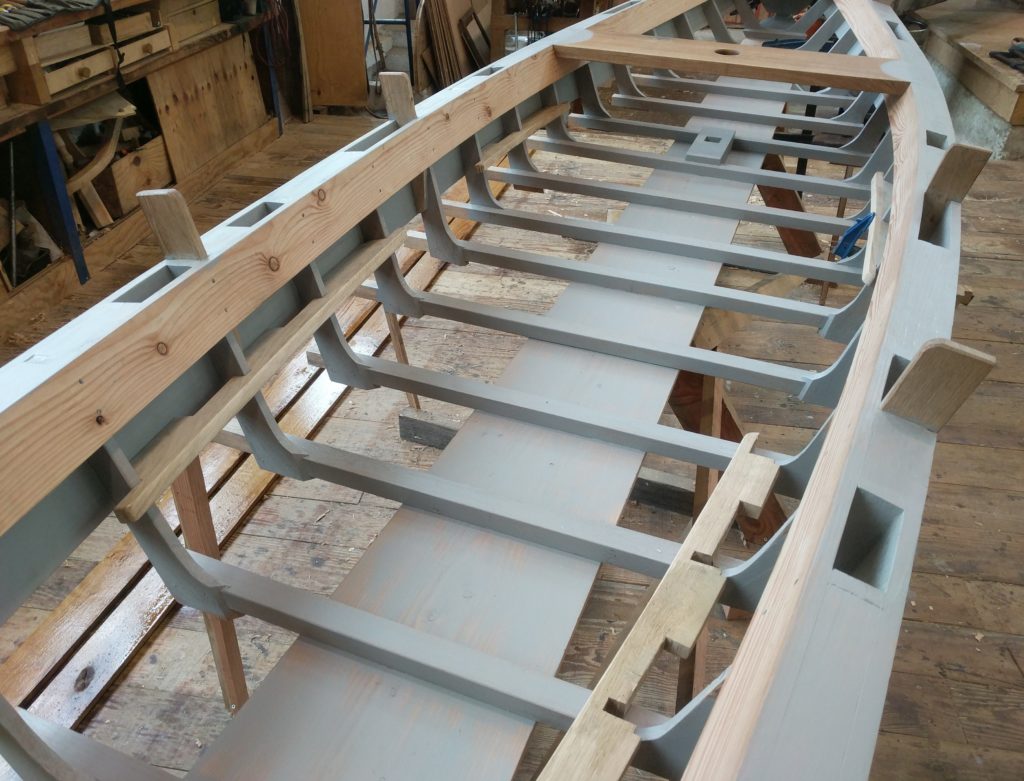
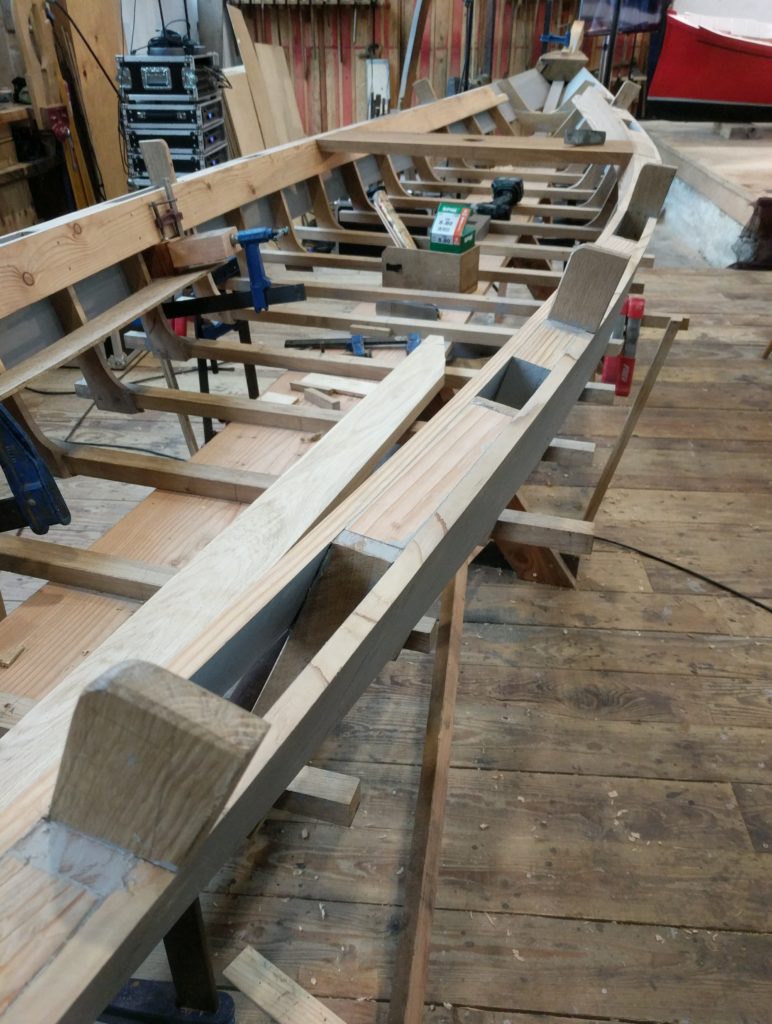
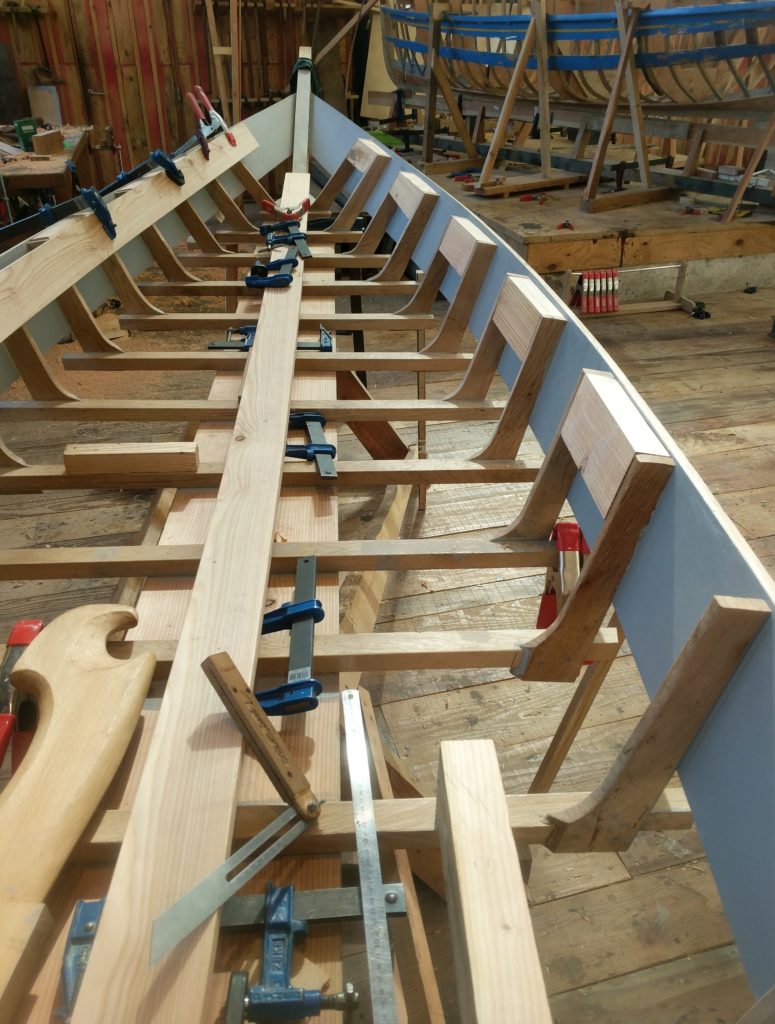
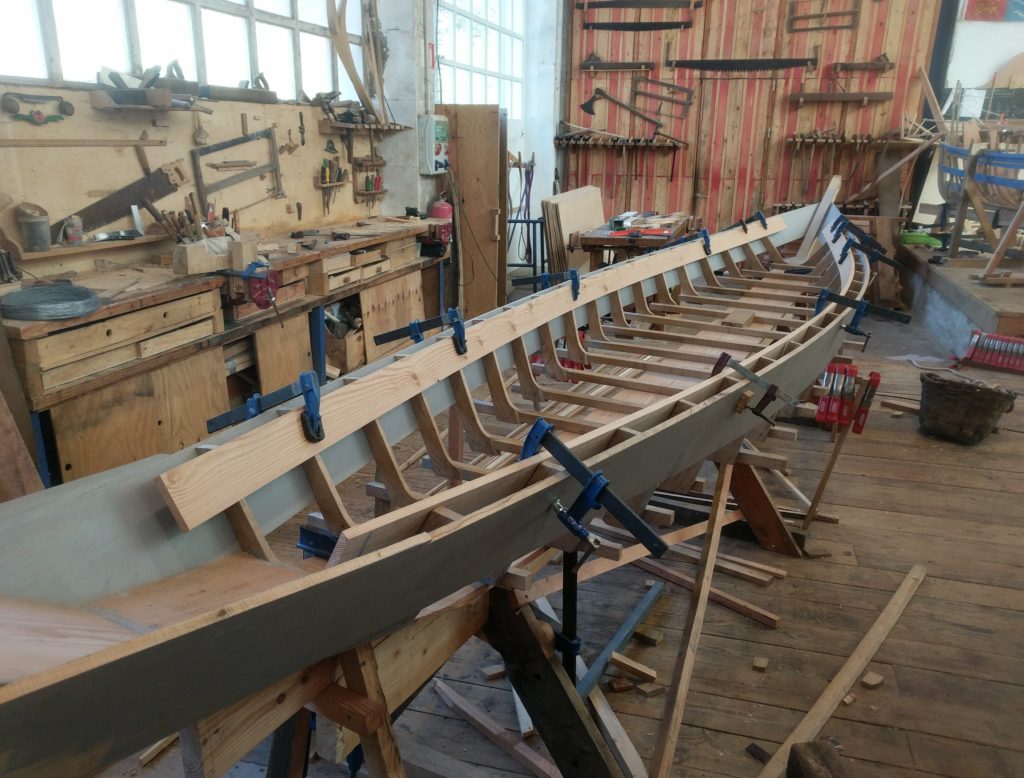
As you can see from the picture, we found some time to position the stringers and fair the frames in order to fasten them.
We also cut all the frame heads, which is always a difficult and at the same time relieving step in the construction process.
So many lines marked on that frame!
Notwithstanding all the measuring (“measure twice, cut once”, they say), some of them look a bit off and will need to be trimmed again later, until they are all nice and consistent. There is no gunwale on this kind of boats, therefore the frames will be visible and we want them to look good.
It sure starts to look more like a boat now
This week Ioanna and I will be back to work on Laguna at 100% and we hope to get some real progress done.
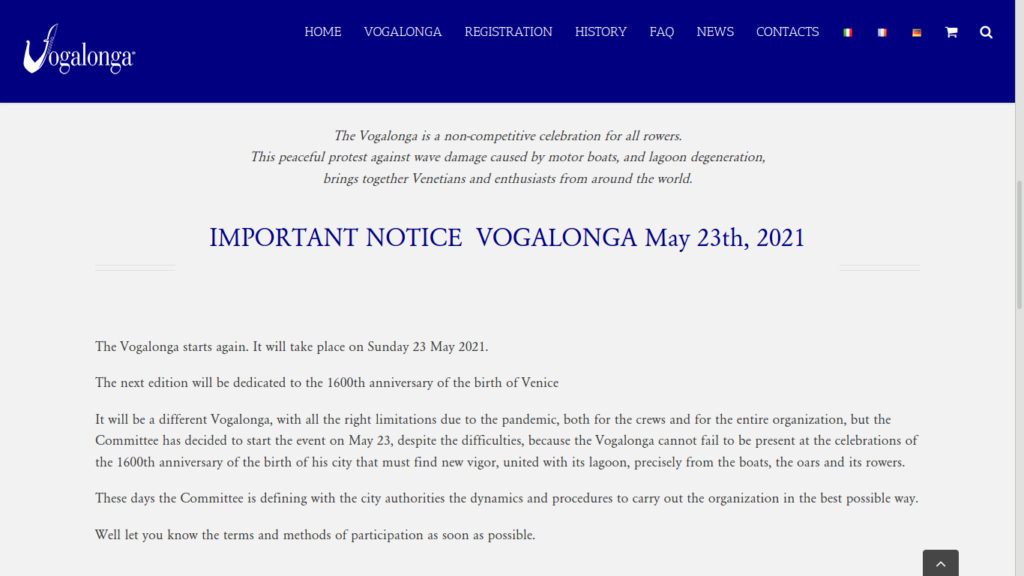
In fact, there are great news from Venice: apparently, the Vogalonga committee is trying to organize this year’s edition for May 23rd!
In 2020 it was sadly cancelled
We may have a deadline for finishing our project.
I’ll make a post devoted to the Vogalonga further on, when we have more news about this year’s edition… and our possible attendance.
I am writing today, because we have been working until Easter. The museum of Albaola was open and a few of us students had to keep the workshop “active” while the guided tours passed by. Good for us, because we actually lost a lot of time trying to wrap our head around many small details that are still not so clear in our minds…
All in all, it has been a week devoted to frames. We finally finished and installed all of them!
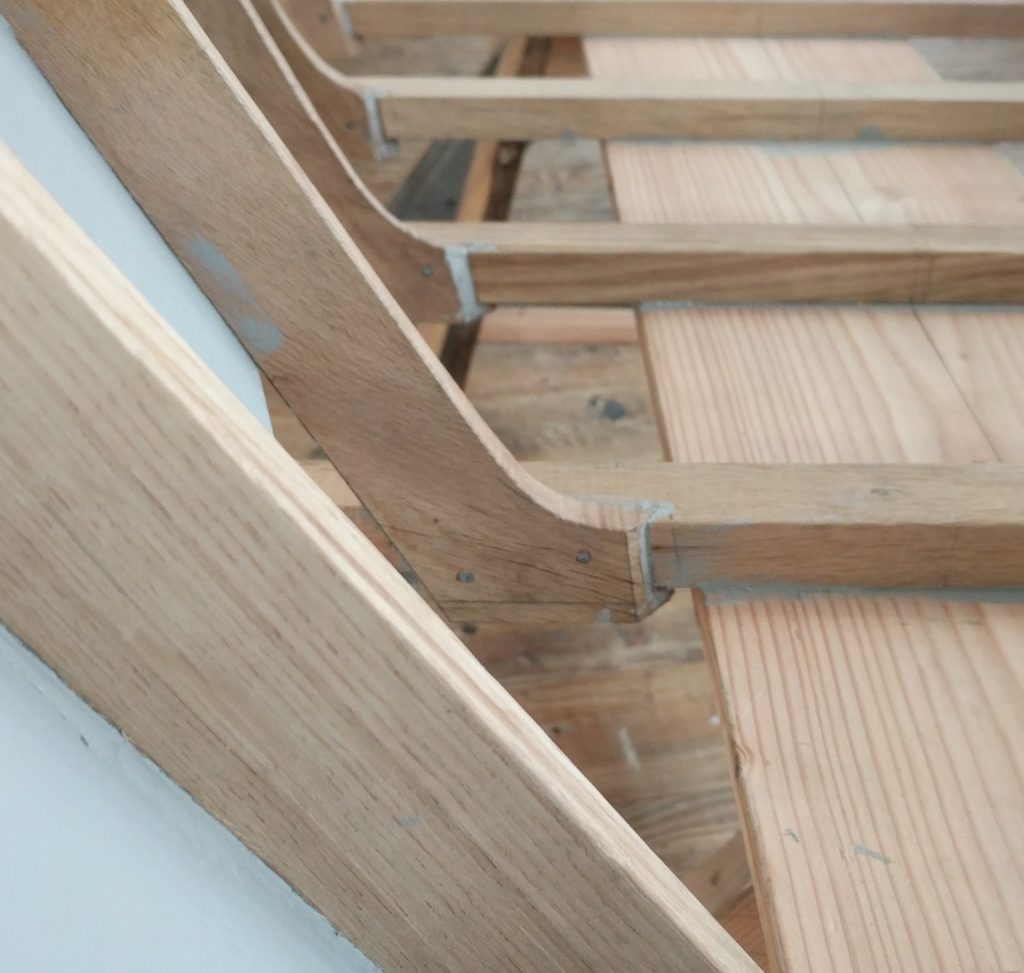
A detail of the peculiar connection between frame (sancon) and floor timber (piana), called “ponto soto” in Venetian.
Unfortunately, trying the stringers on, we realized that they will need a bit of fairing on the inside of the boat. One of the frames is actually quite different in dimensions, because it was made by a volunteer, interested in joining the school next year.
It’s always difficult to make sure that volunteers have a full picture of what they need to do, probably we should have double- and triple-checked the frame before installing it. Now it’s too late, I hope we can fix it next week without having to disassemble it…
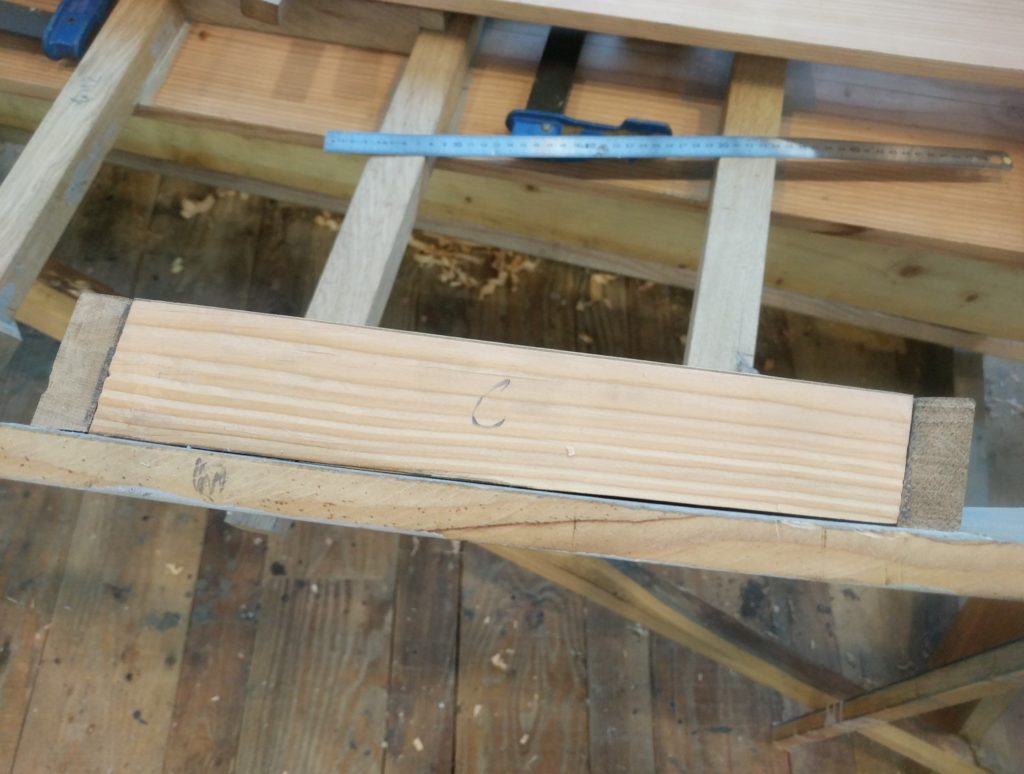
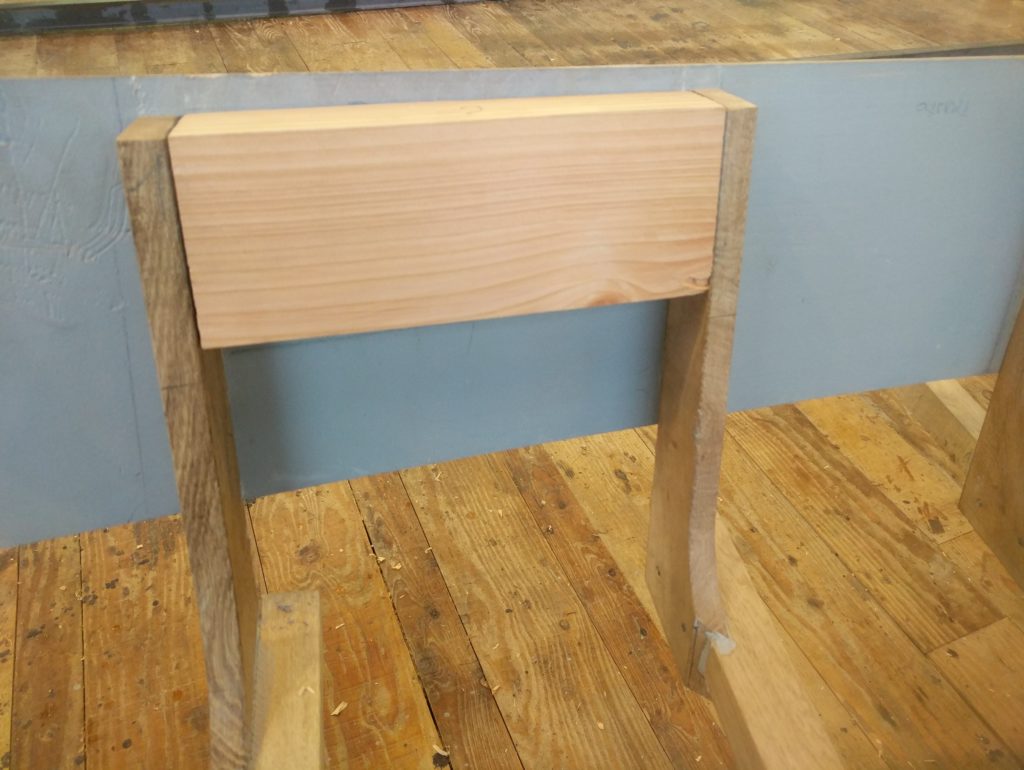
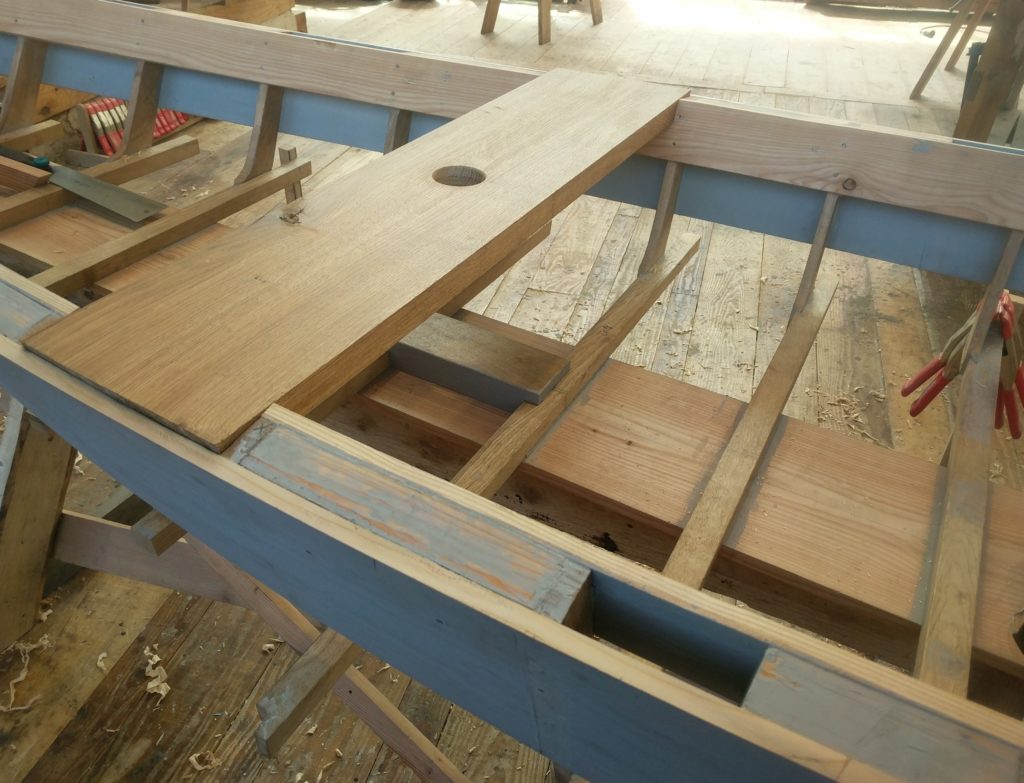
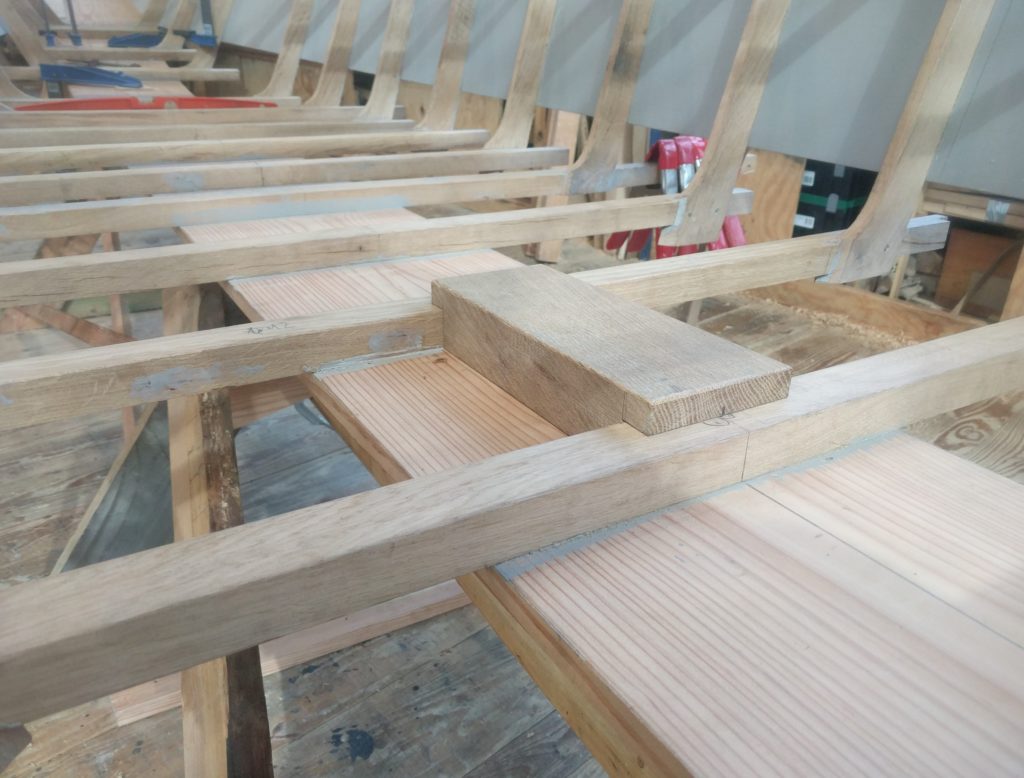
Another volunteer (he’s also interested in the school, let’s hope next year there will be more new people than there were this one), made the mast-step. It touches the bottom of the boat, even though sometimes it is suspended on the frames to allow water to pass below it in the bilge. It raises two cm above the frames, so that it will be flush with the floor boards.
The actual hole for the foot of the mast will be made when we have the thwart/mast-partner in place.
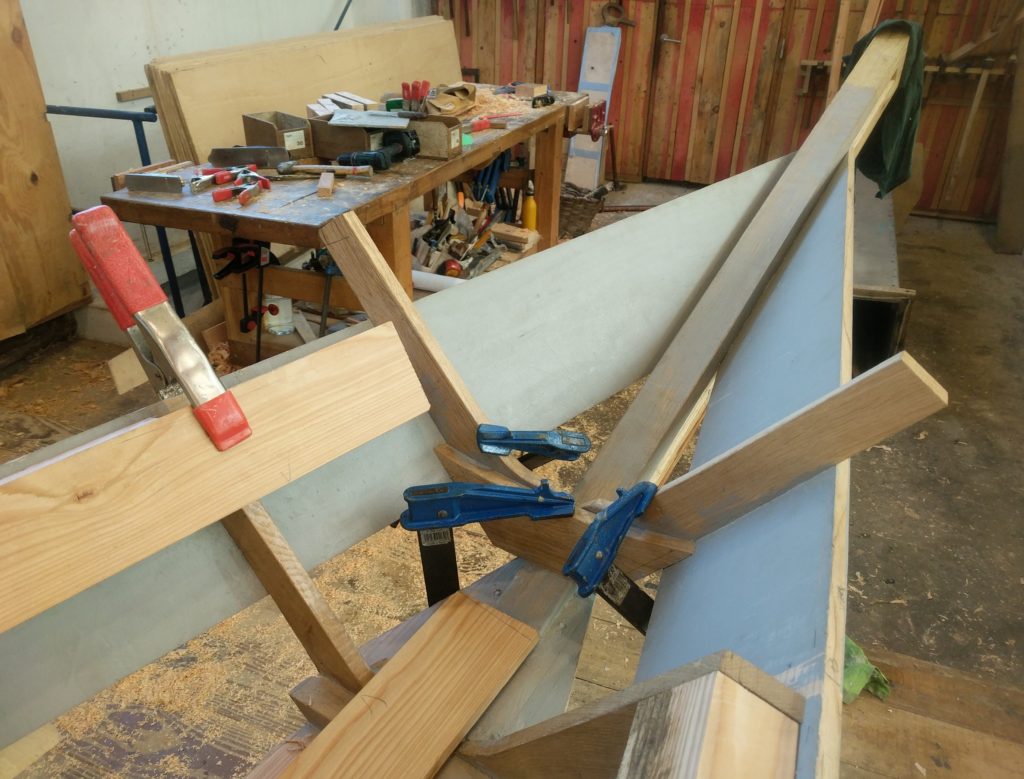
I have started thinking of the forward deck, and cut the first beam out of a curved-grain larch offcut. There will be three beams in total, but I never got to installing it because we still need to trim the edges of the planks.
This is where we lost a lot of time. The edge of the planks, which is now square, has a rolling bevel with the angle changing as you move towards the ends of the planks, where it flares out. This bevel is usually planed “by eye”, and we don’t have that skill yet.
The top of the planks also affects the angle at which the frame-heads will be cut (the edge is not level, since Venetian gunwhales are usually tilt outwards). Nobody wants to cut them and then find out they are too short!
BONUS:
My boatbuilder friend Nicolò Zen has been helping me a lot during the last weeks, and he has sent me a couple interesting things lately. The first one is a picture of the boat from which the plans we are using were taken:
Sorry if I am bit late with this update on last week’s progress. As I mentioned in my last post, we had a press conference on Wednesday, and this weekend I have been busy looking for all the articles that have been published. They are quite a few, both in Spanish and Basque (plus an Italian one, on a local newspaper of Venice).
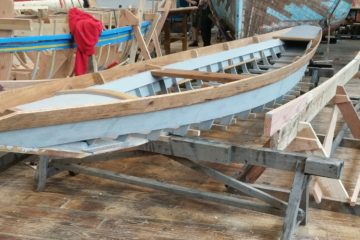
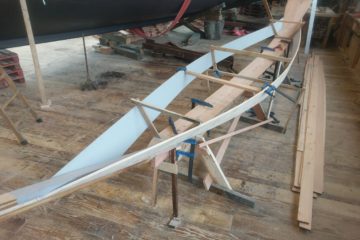
But let’s go back for a second at the beginning of the week. This is the boat as we left it the previous week.
It starts looking like a boat, right?
We had decided we wanted to have something to show to the journalists, so on Tuesday we finally nailed the sheer planks on.
Galvanized nails are our fastening of choice: traditionally irreproachable and also cheap!
Here a close-up of the new stem (the cutwater still needs to be shaped). The nail heads will later be covered with puddy, and then painted over together with the sides. On the plank it’s easy to spot one (or two) diamond-shaped repairs, which replaced dead knots.
Not sure the dutchman on the bottom side is visible from here, though (same reason, but with knot too close to the edge)
Very happy with the result, after the press left we realized we had actually hanged the planks lower than they should have been. This is what you get when you work in a hurry!
Nobody noticed, of course, and until the boat stays in the Basque Country nobody ever will, probably. But today a Venetian friend (Gilberto Penzo, the author of the plans, nonetheless) called me to ask why the sheer looked so low…
I guess that for your first construction you are bound to make mistakes.
The problem is that by now we have already started fitting in the other frames, nailing them in place. There’s no way to move the planks now.
I really hope nobody else has Gilberto’s eye out there.
Albaola’s museum will open this Easter, so we’ll keep working through the holidays. I hope we can finish all the frames, and install the seat-riser by the end of the week. Maybe we might as well start thinking about the decks?
Ciao! Lo vuoi un biscotto? (Questo sito c'ha dei cookie, credo. Di certo c'è una privacy policy da qualche parte) Oh, grazieLeggi
Privacy & Cookies Policy
Privacy Overview
This website uses cookies to improve your experience while you navigate through the website. Out of these, the cookies that are categorized as necessary are stored on your browser as they are essential for the working of basic functionalities of the website. We also use third-party cookies that help us analyze and understand how you use this website. These cookies will be stored in your browser only with your consent. You also have the option to opt-out of these cookies. But opting out of some of these cookies may affect your browsing experience.
Necessary cookies are absolutely essential for the website to function properly. This category only includes cookies that ensures basic functionalities and security features of the website. These cookies do not store any personal information.
Any cookies that may not be particularly necessary for the website to function and is used specifically to collect user personal data via analytics, ads, other embedded contents are termed as non-necessary cookies. It is mandatory to procure user consent prior to running these cookies on your website.